![]()


Your language is not yet supported and you want to help with the translation? Follow this guide.
The Reef card for Home Assistant helps you manage your reef aquarium.
Combined with ha-reefbeat-component, it automatically supports your Redsea (ReefBeat) devices.
Note
If you have non-Redsea devices and want them to be supported, you can request it here.
✅ Implemented ☑️ In progress ❌ Planned
| Model | Status | Issues 📆(Planned) 🐛(Bugs) |
||
| ReefATO+ | RSATO+ | ❌ | 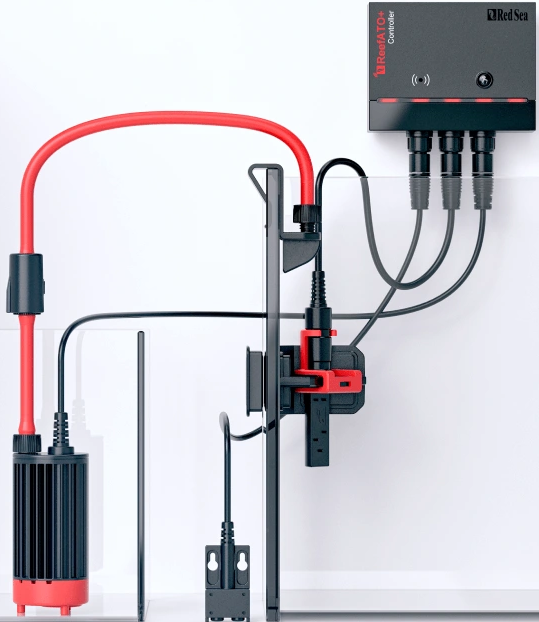 |
📆 🐛 |
| ReefControl | RSSENSE If you own one, you can contact me here and I will add its support. | ❌ | 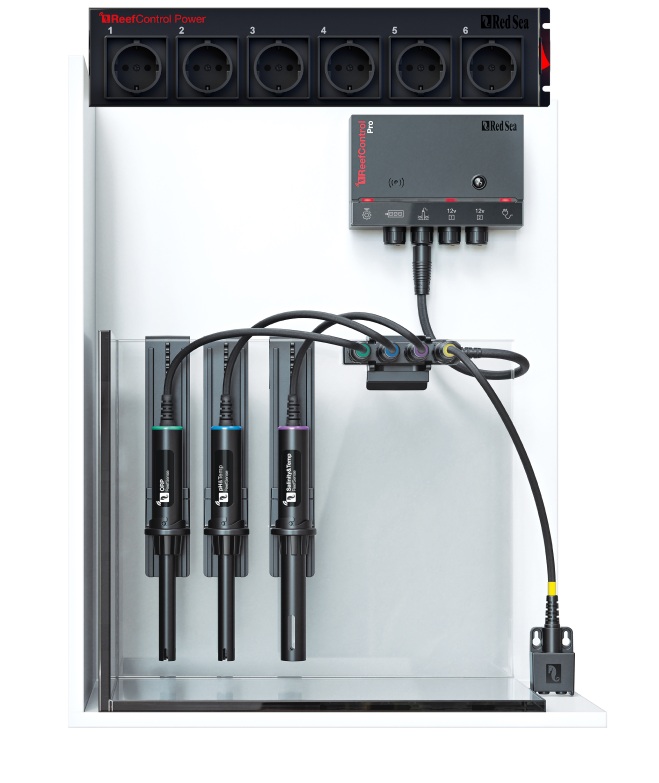 |
📆 🐛 |
| ReefDose | RSDOSE2 | ✅ | 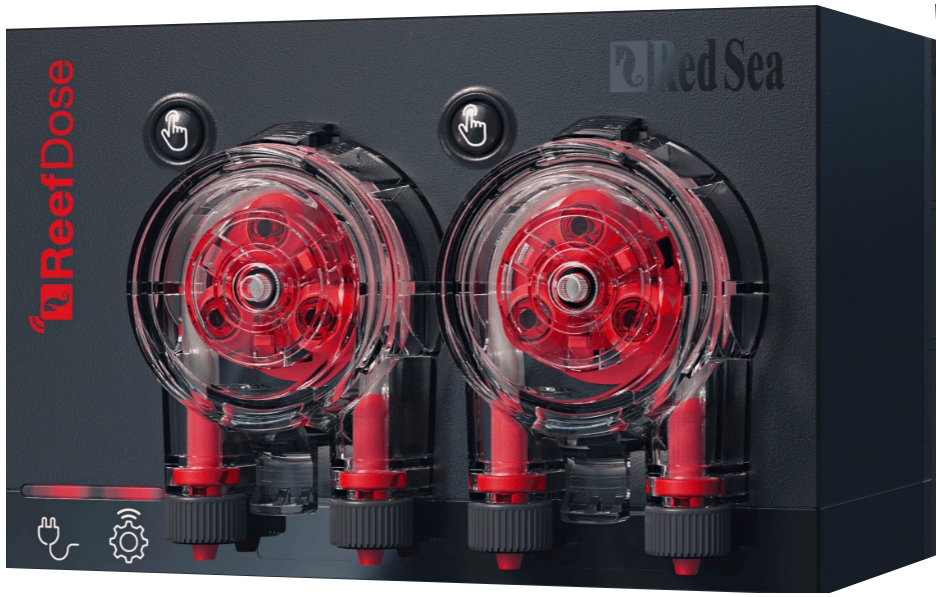 |
📆 🐛 |
| RSDOSE4 | ✅ | 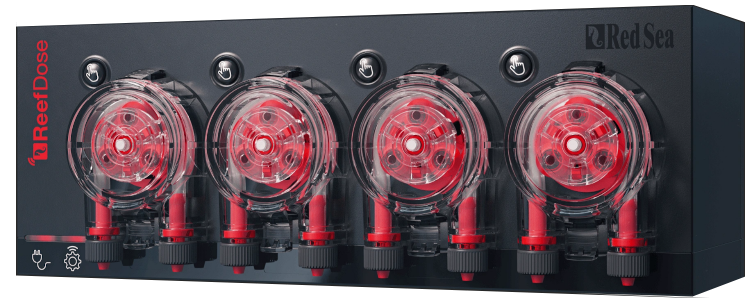 |
||
| ReefLed | G1 | ❌ | 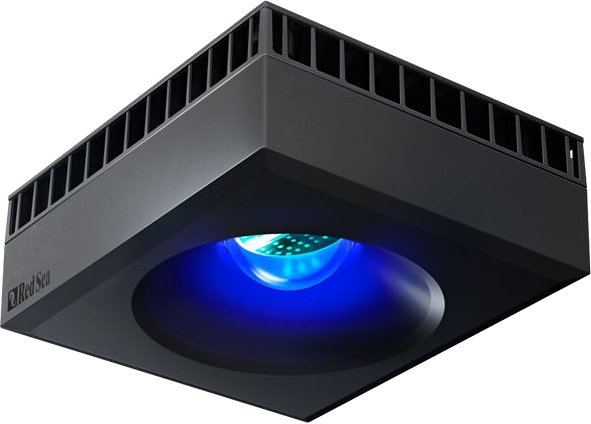 |
📆 🐛 |
| G2 | ❌ | 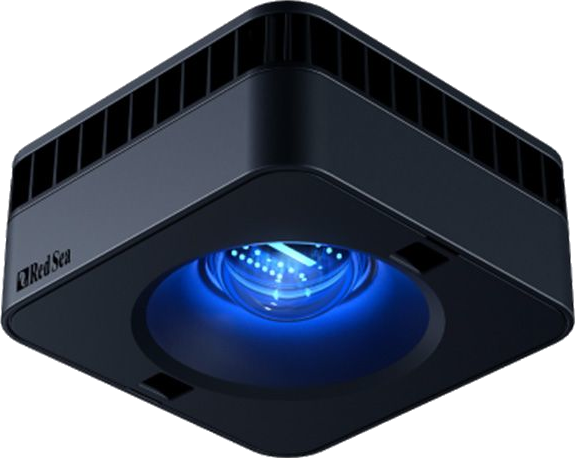 |
||
| ReefMat | RSMAT250 | ✅ | 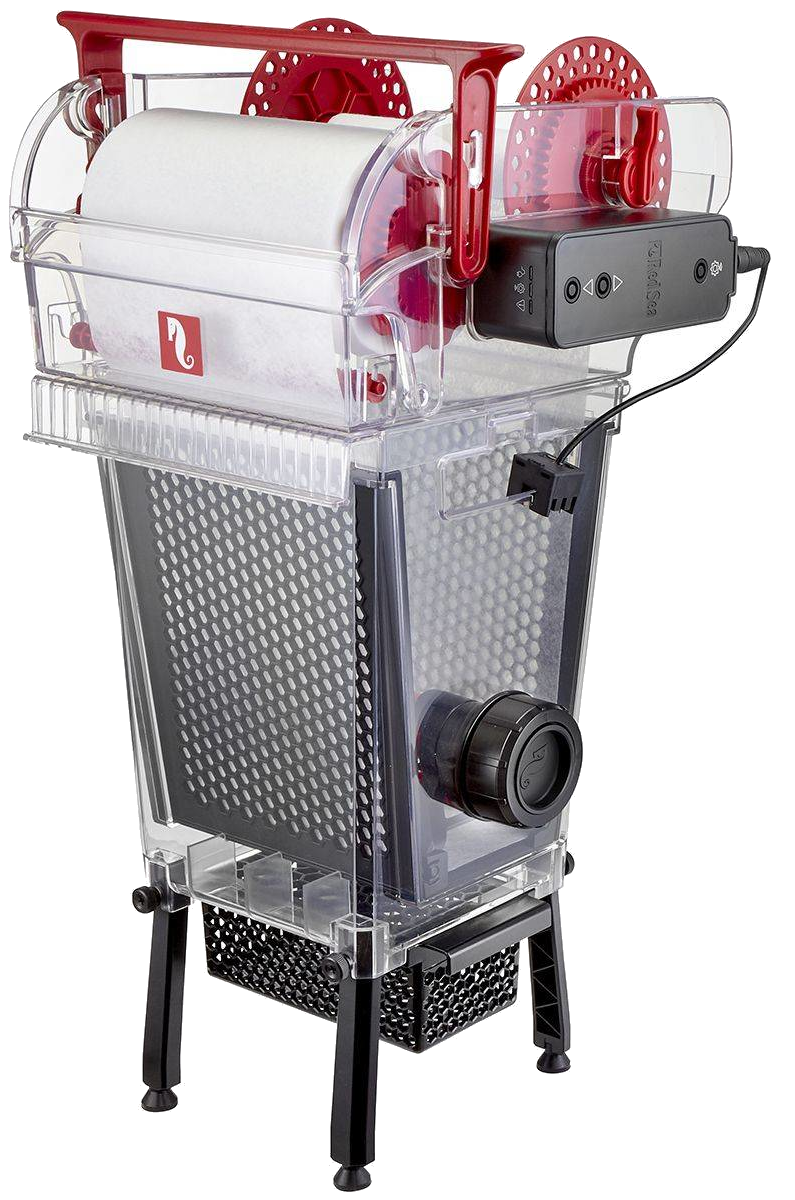 |
📆 🐛 |
| RSMAT500 | ✅ | |||
| RSMAT1200 | ✅ | |||
| ReefRun | RSRUN | ☑ | 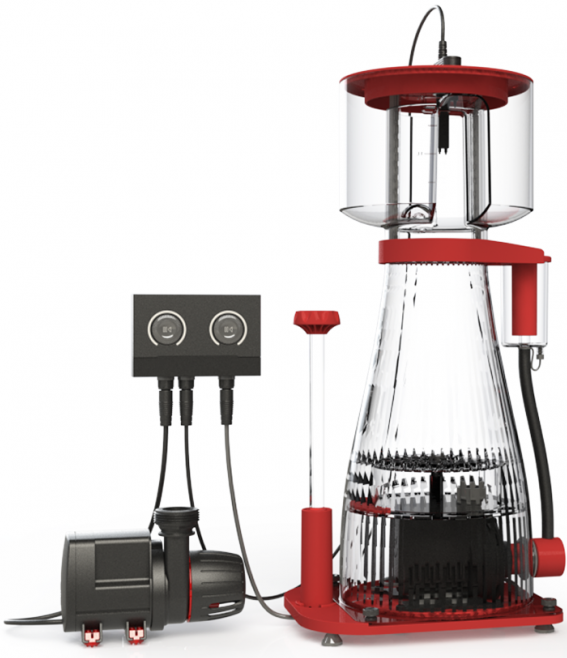 |
📆 🐛 |
| ReefWave | RSWAVE | ❌ | 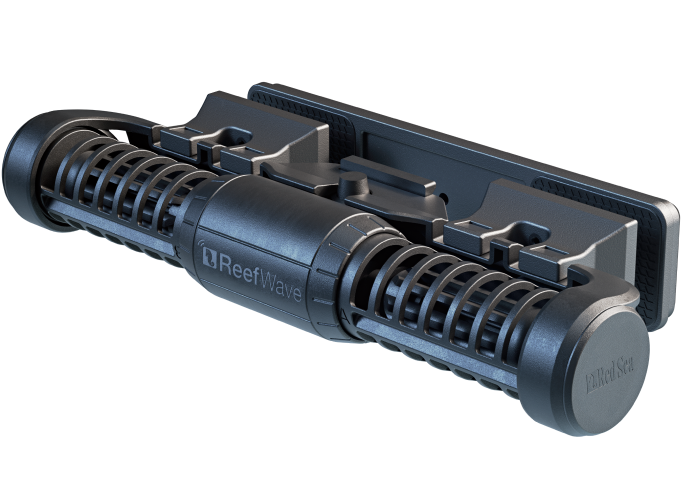 |
📆 🐛 |
Click here to open the repository directly in HACS and click "Download":

Or search for «reef-card» in HACS.

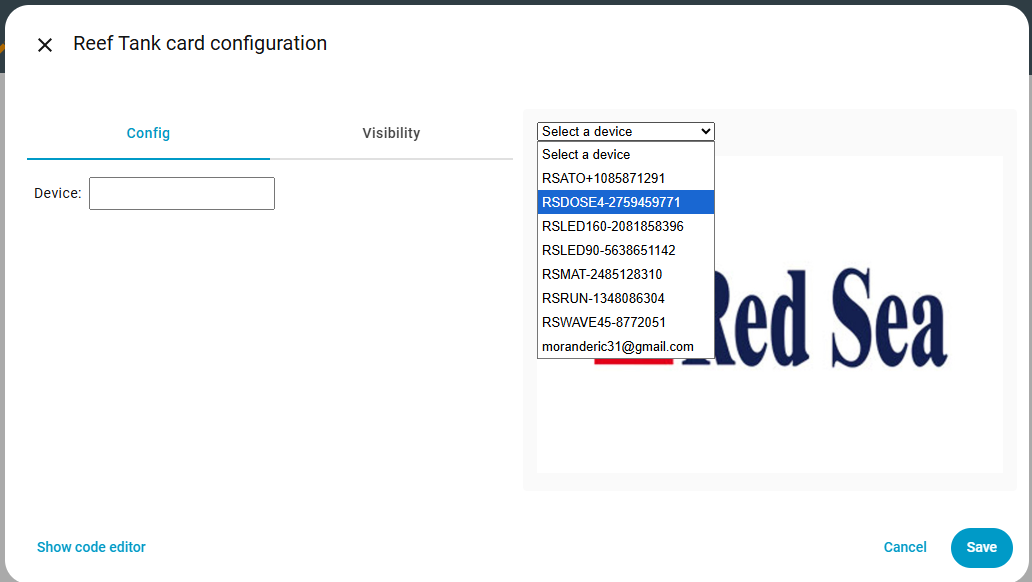
Without the device parameter, the card automatically detects all ReefBeat devices and lets you choose the one you want.
To remove device selection and force a specific one, set the device parameter to the name of your device.
 |
 |
Planned.
Want it supported sooner? Vote here.
Planned.
Want it supported sooner? Vote here.
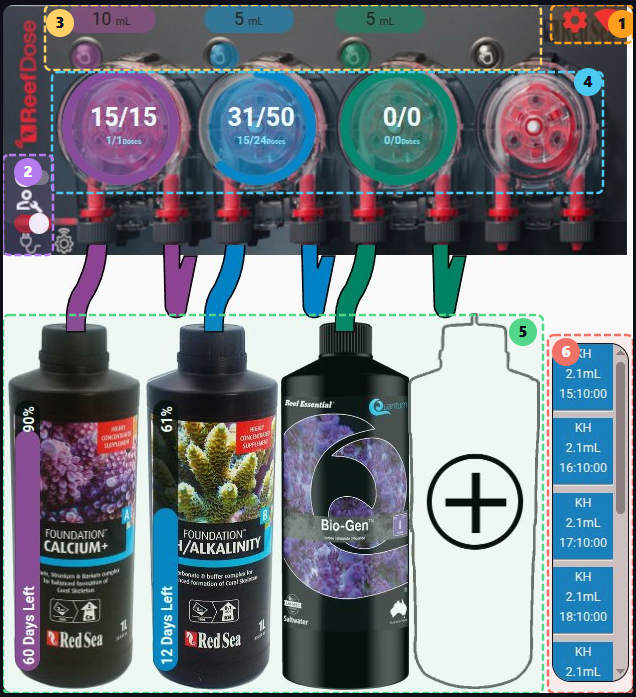
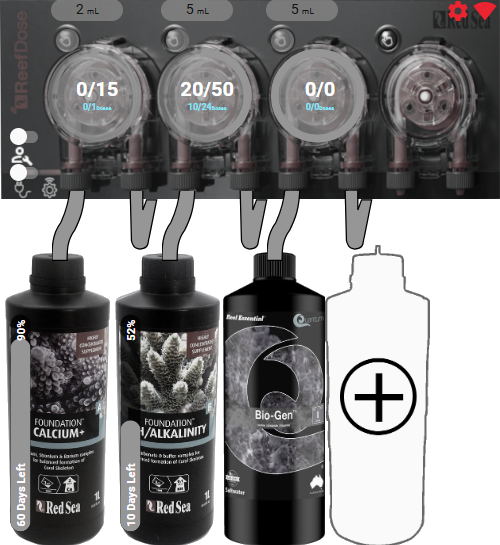
ReefDose with ha-reef-card in action:
The ReefDose card is divided into 6 zones:
- Configuration/WiFi Information
- States
- Manual Dosing
- Head configuration and scheduling
- Supplement management
- Future dose queue

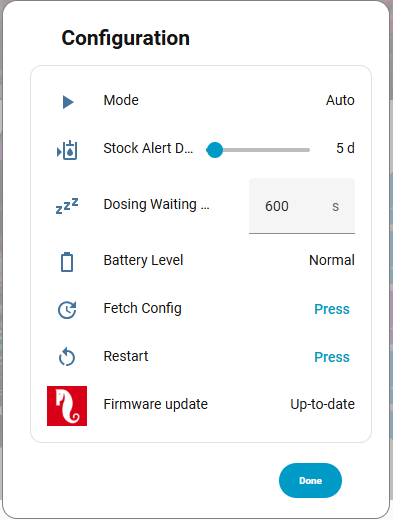
Click the icon ![]() to manage the general configuration of the ReefDose.
to manage the general configuration of the ReefDose.
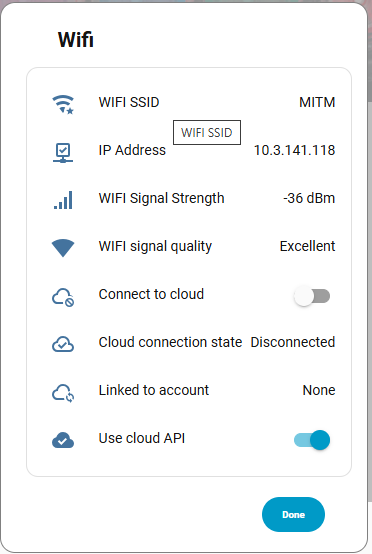
Click the icon ![]() to manage the network settings.
to manage the network settings.

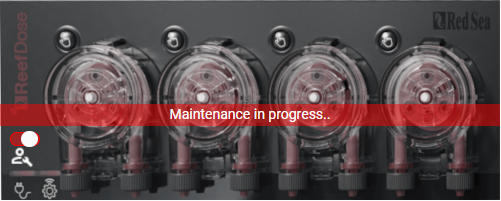
The maintenance switch  switches the device to maintenance mode.
The on/off switch  toggles the ReefDose between on and off states.

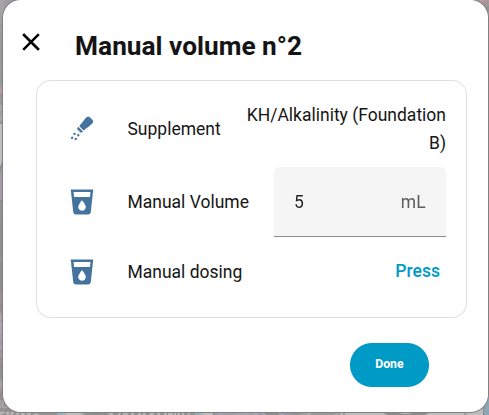
The button  displays the default manual dose for this head. Clicking it opens the configuration dialog for this dosing.
You can add shortcuts using the card editor:
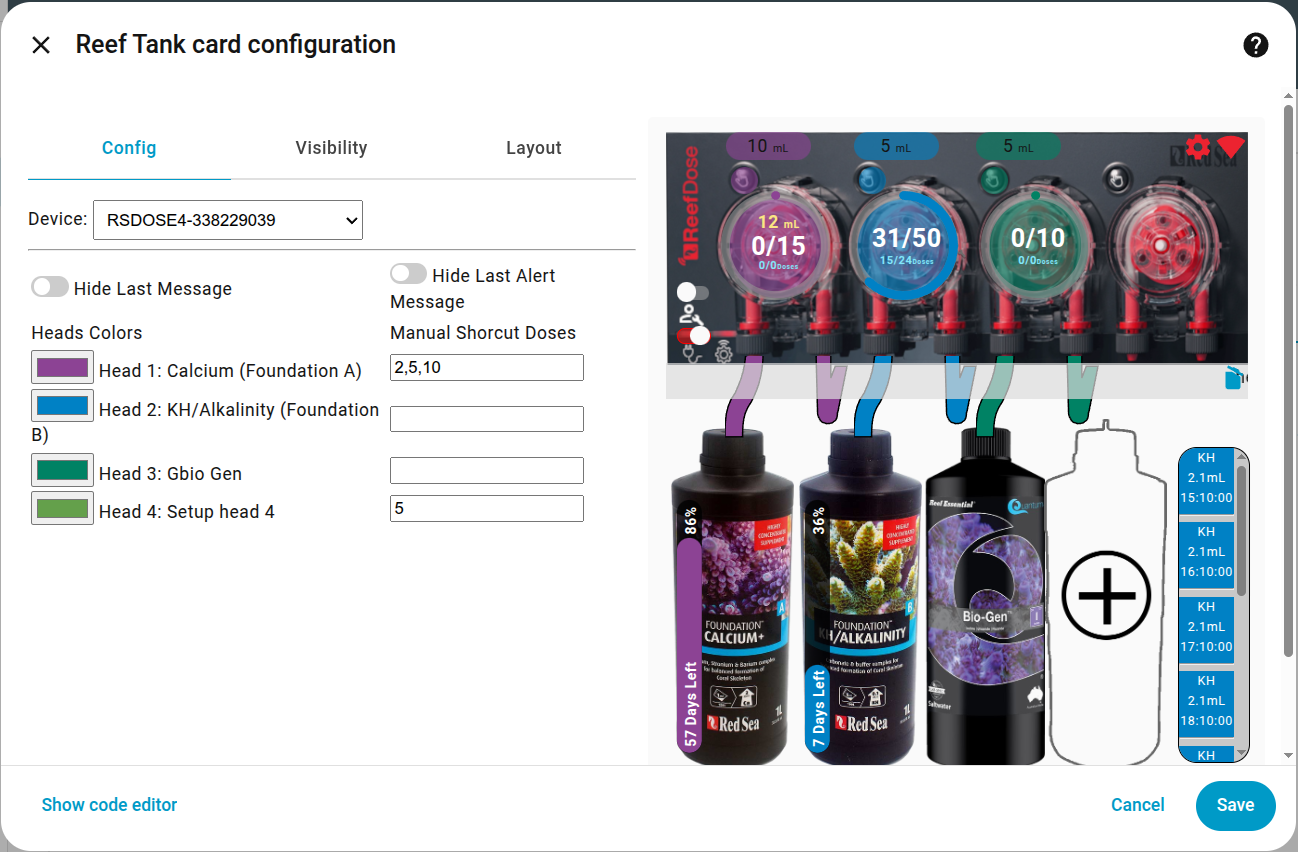
For example, head 1 offers 2, 5, and 10 mL as shortcuts.
These values will appear at the top of the dialog. Clicking a shortcut sends a command to dose the defined value.
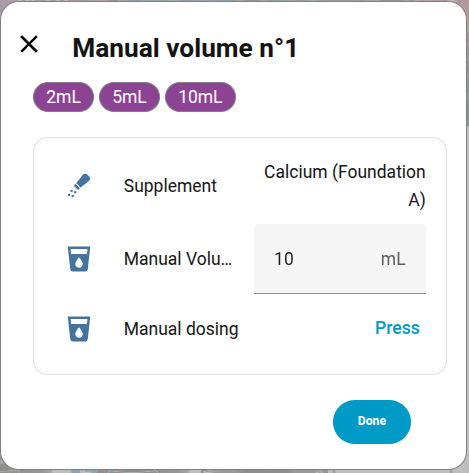
Pressing the manual dose button:  sends a dose command with the default value displayed just above:
  , i.e. 10 mL in this example.
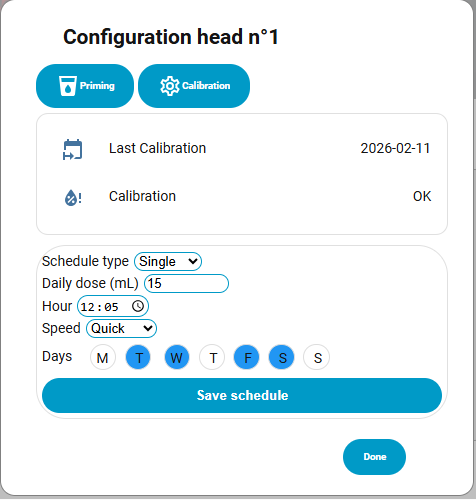
This zone allows you to view the current head schedule and change it.
-
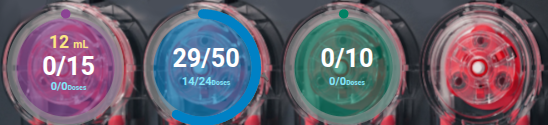
The colored circular ring indicates the percentage of the daily dose already delivered.
-
The yellow number at the top shows the cumulative daily manual dose total.
-
The central part shows the volume delivered compared to the total programmed daily volume.
-
The blue lower part shows the number of doses delivered compared to the total doses for the day (example: 14/24 for blue because it is an hourly schedule and this screenshot was taken at 14:15). The values for purple and green show 0/0 because these doses are scheduled for 8:00 but the integration was started after 8:00, so there will be no doses today.
-
A long press on one of the 4 heads toggles it on/off.
-
A click on a head opens the scheduling dialog. From this dialog you can run a priming cycle, recalibrate the head, change the daily dose and its schedule. Don't forget to save the schedule before closing.
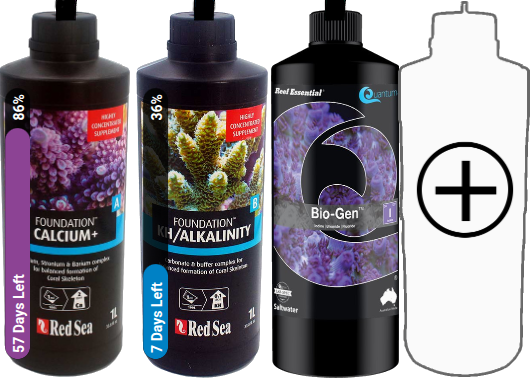
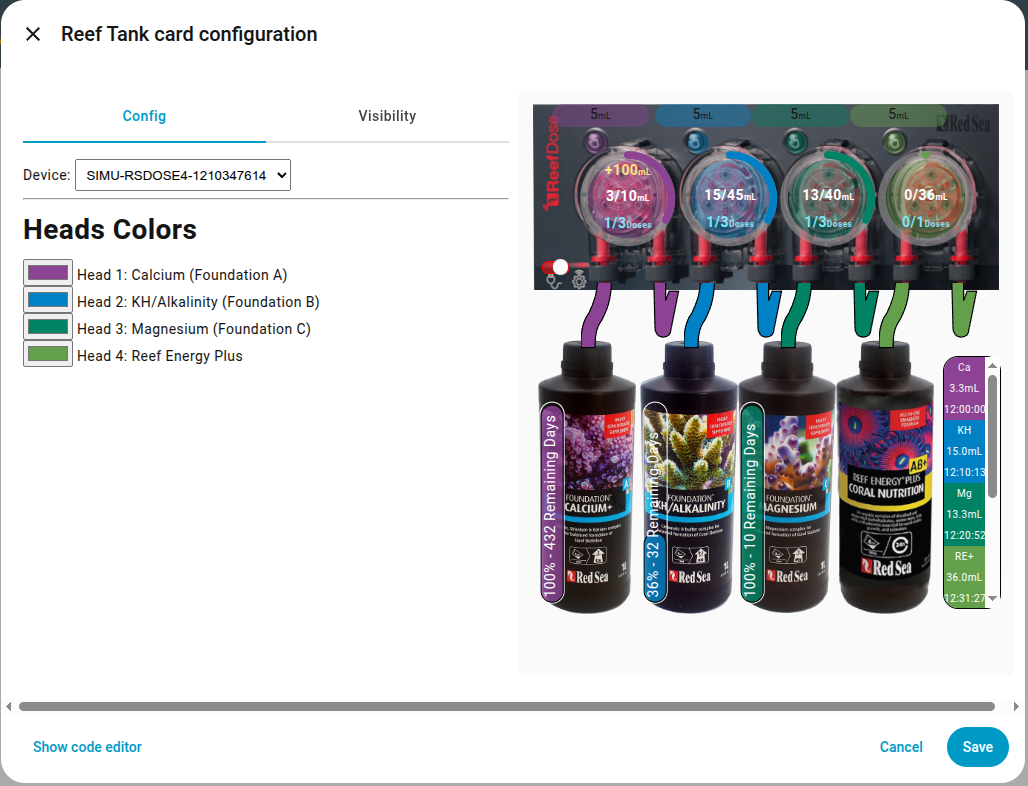
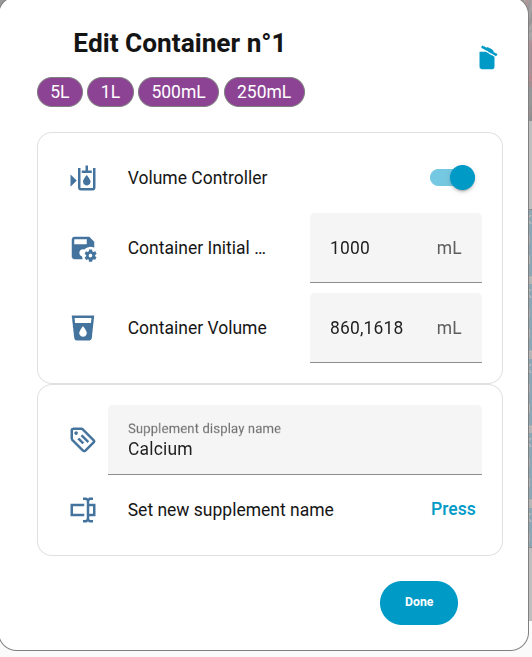
This zone is used to manage supplements. If a supplement is already declared, clicking on it will open the configuration dialog where you can:
- Delete the supplement (trash icon at the top right)
- Specify the total volume of the container
- Specify the actual volume of the supplement
- Decide whether you want to track the remaining volume. Clicking the shortcuts at the top will enable tracking and set default values for a full container.
- Change the display name of the supplement.
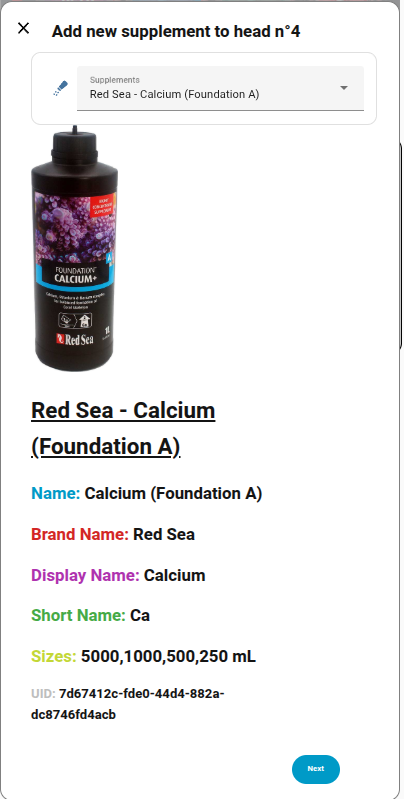
If no supplement is linked to a head, you can add one by clicking on the container with a '+' (head 4 in our example).

Then follow the instructions:
Here is the list of supported images for supplements, grouped by brand. If yours has a ❌, you can request its addition here.
ATI 2/2 🖼️
| ✅ | Essential Pro 1 |  |
| ✅ | Essential Pro 2 |  |
Aqua Forest 3/9 🖼️
| ✅ | Ca Plus |  |
| ❌ | Calcium | |
| ❌ | Component 1+ | |
| ❌ | Component 2+ | |
| ❌ | Component 3+ | |
| ❌ | KH Buffer | |
| ✅ | KH Plus |  |
| ❌ | Magnesium | |
| ✅ | Mg Plus |  |
BRS 0/4 🖼️
| ❌ | Liquid Calcium | |
| ❌ | Liquid alkalinity | |
| ❌ | Magnesium Mix | |
| ❌ | Part C | |
Brightwell 0/12 🖼️
| ❌ | Calcion | |
| ❌ | Ferrion | |
| ❌ | Hydrate - MG | |
| ❌ | KoralAmino | |
| ❌ | Koralcolor | |
| ❌ | Liquid Reef | |
| ❌ | Potassion | |
| ❌ | Reef Code A | |
| ❌ | Reef Code B | |
| ❌ | Replenish | |
| ❌ | Restore | |
| ❌ | Strontion | |
ESV 0/5 🖼️
| ❌ | B-Ionic Component 1 | |
| ❌ | B-Ionic Component 2 | |
| ❌ | B-Ionic Magnesium | |
| ❌ | Transition elements | |
| ❌ | Transition elements plus | |
Fauna Marine 0/11 🖼️
| ❌ | Amin | |
| ❌ | Balling light trace 1 | |
| ❌ | Balling light trace 2 | |
| ❌ | Balling light trace 3 | |
| ❌ | Balling light Ca | |
| ❌ | Balling light KH | |
| ❌ | Balling light Mg | |
| ❌ | Blue trace elements | |
| ❌ | Green trace elements | |
| ❌ | Min S | |
| ❌ | Red trace elements | |
Quantum 7/7 🖼️
| ✅ | Aragonite A |  |
| ✅ | Aragonite B |  |
| ✅ | Aragonite C |  |
| ✅ | Bio Kalium |  |
| ✅ | Bio Metals |  |
| ✅ | Bio enhance |  |
| ✅ | Gbio Gen |  |
Red Sea 10/13 🖼️
| ✅ | Bio Active (Colors D) |  |
| ✅ | Calcium (Foundation A) |  |
| ❌ | Calcium (Powder) | |
| ✅ | Iodine (Colors A) |  |
| ✅ | Iron (Colors C) |  |
| ✅ | KH/Alkalinity (Foundation B) |  |
| ❌ | KH/Alkalinity (Powder) | |
| ✅ | Magnesium (Foundation C) |  |
| ❌ | Magnesium (Powder) | |
| ✅ | NO3PO4-X |  |
| ✅ | Potassium (Colors B) |  |
| ✅ | Reef Energy Plus |  |
| ✅ | ReefCare Program |  |
Seachem 0/9 🖼️
| ❌ | Reef Calcium | |
| ❌ | Reef Carbonate | |
| ❌ | Reef Complete | |
| ❌ | Reef Fusion 1 | |
| ❌ | Reef Fusion 2 | |
| ❌ | Reef Iodine | |
| ❌ | Reef Plus | |
| ❌ | Reef Strontium | |
| ❌ | Reef Trace | |
Triton 0/4 🖼️
| ❌ | Core7 elements 1 | |
| ❌ | Core7 elements 2 | |
| ❌ | Core7 elements 3A | |
| ❌ | Core7 elements 3B | |
Tropic Marin 5/14 🖼️
| ❌ | A Element | |
| ✅ | All-For-Reef |  |
| ✅ | Amino Organic |  |
| ❌ | Balling A | |
| ❌ | Balling B | |
| ❌ | Balling C | |
| ✅ | Bio-Magnesium |  |
| ✅ | Carbo Calcium |  |
| ❌ | Elimi-NP | |
| ❌ | K Element | |
| ❌ | Liquid Buffer | |
| ❌ | NP-Bacto-Balance | |
| ❌ | Plus-NP | |
| ✅ | Potassium |  |
Planned.
Want it supported sooner? Vote here.
ReefMat with ha-reef-card in action:
The ReefMat card is divided into 7 zones:
- Configuration / Wifi Information
- States
- Roll information (total length used, remaining length, end of roll, mode...)
- Manual/Automatic Advance
- Sensor
- Scheduled Advance
- Weekly / Monthly Usage Graph

The background image changes according to the roll usage status, with 5 different images:
 0% |
 25% |
 50% |
 75% |
 100% |

Click the icon ![]() to manage the general configuration of the ReefMat.
to manage the general configuration of the ReefMat.

Click the icon ![]() to manage the network settings.
to manage the network settings.


The maintenance switch ![]() switches to maintenance mode.
switches to maintenance mode.

The on/off switch ![]() switches the ReefMat between on and off states.
switches the ReefMat between on and off states.


This zone displays the real-time status of the filter roll, from top to bottom:
- The total length used since the start of the roll (top, in red)
- The remaining length in the centre in red. When the roll is empty, a
 blinking icon appears instead and a dialog box offers to replace the roll.

- The number of days remaining before the end of the roll, estimated from the daily average consumption (in black)
- The daily average consumption in cm (bottom left)
- The current operating mode: Auto, Maintenance, Off… (below the RedSea logo)
- The roll usage percentage (circular arc, bottom right)
If an anomaly is detected, the RedSea logo transforms into a ![]() blinking icon.
Clicking this alert opens the anomaly dialog box:
blinking icon.
Clicking this alert opens the anomaly dialog box:


This zone controls the roll advance.
From left to right:
- The
 button triggers a manual advance of the roll by the length shown in the centre.
 - The displayed advance value (in cm) is the value sent when the button is pressed. Clicking this number opens the editing dialog.

- The automatic advance button

 enables or disables the automatic roll advance.

This zone shows the status of the level sensor.
Three states are possible:
| State | Image |
|---|---|
| Sensor connected |  |
| Sensor disconnected |  |
| Dirty sensor |  |

This button ![]()
![]() shows the scheduled advance status and allows editing it by clicking on it.
shows the scheduled advance status and allows editing it by clicking on it.


This zone displays a graph of roll consumption over time. Clicking the button toggles between the two available modes:
- Weekly mode shows consumption over the last 7 days.
- Monthly mode shows consumption over the last 30 days.
Pressing the top left of the graph opens the detailed view in Home Assistant.

This zone displays the latest system messages from the ReefMat. It has two lines:
- The grey line shows the last message received.
- The pink line shows the last alert, preceded by the ⚠ symbol.
Clicking the ![]() icon clears the corresponding message.
icon clears the corresponding message.
These lines can be hidden via the card editor interface.

Planned.
Want it supported sooner? Vote here.
Planned.
Want it supported sooner? Vote here.