An Arduino library for controlling a 5x5x5 LED cube using shift registers.
Cubong is a library designed to simplify the control of a 5x5x5 LED cube (125 LEDs total) using the Arduino platform. The library uses shift registers (SN74HC595N) for multiplexing the LED matrix, allowing you to control all 125 LEDs using only a few digital pins.
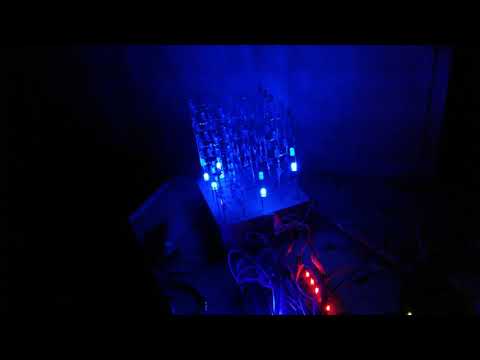
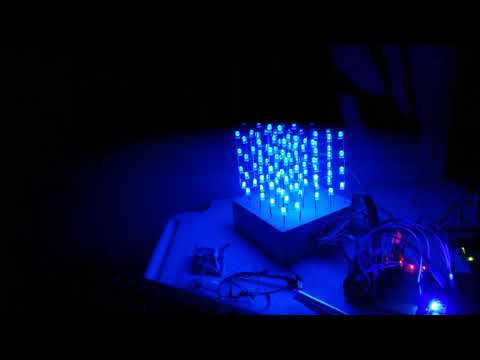
 5x5x5 blue led matrix
 Power management driver
 Logical driver - top
 Logical driver - bottom
- Simple LED Control: Turn individual LEDs on/off using 3D coordinates (x, y, z)
- Layer Management: Control entire layers (planes) of the cube
- 3D Tensor System: Use a 3D boolean array to represent the entire cube state
- Animation Support: Built-in functions for creating patterns and animations
- Text Display: Display letters (M, I, S) in the cube
- Box Class: Create animated objects that can move through the cube
- Multiple Examples: Includes 10 example sketches demonstrating various features
- Arduino board (Uno, Mega, or compatible)
- 5x5x5 LED cube
- 4x SN74HC595N shift registers (or more, depending on your configuration)
- ULN2003 Darlington transistor arrays for layer control
- Resistors for LEDs
- Power supply (sufficient for all LEDs)
The library is designed to work with the SN74HC595N shift register. Pin configuration:
1  - Q1 (Output 1)
2  - Q2 (Output 2)
3  - Q3 (Output 3)
4  - Q4 (Output 4)
5  - Q5 (Output 5)
6  - Q6 (Output 6)
7  - Q7 (Output 7)
8  - GND
9  - Q7' (Serial Data Output for cascading)
10 - Master Reset (connect to +5V)
11 - Clock
12 - Latch
13 - Output Enable (connect to GND or Arduino pin)
14 - Serial Data Input
15 - Q0 (Output 0)
16 - Vcc (+5V)
- Download this repository as a ZIP file
- In Arduino IDE, go to Sketch → Include Library → Add .ZIP Library...
- Select the downloaded ZIP file
- The library will be installed and available in your sketches
- Download this repository
- Copy the
Cubongfolder to your Arduino libraries folder:- Windows:
Documents\Arduino\libraries\ - Mac:
~/Documents/Arduino/libraries/ - Linux:
~/Arduino/libraries/
- Windows:
- Restart the Arduino IDE
#include <Cubong.h>

// Create Cubong object
// Parameters: data, latch, clock, enable, layer0, layer1, layer2, layer3, layer4
Cubong cube(7, 6, 5, 4, 8, 9, 10, 11, 12);

void setup() {
  Serial.begin(9600);
}

void loop() {
  // Turn on a single LED at position (2, 2, 2)
  cube.led(2, 2, 2);
  delay(1000);

  // Turn off all LEDs
  cube.spengi();
  delay(1000);
}Cubong(int data, int latch, int clock, int enable, int l0, int l1, int l2, int l3, int l4)Create a Cubong object with specified pin connections.
Parameters:
data- Serial data pin for shift registerlatch- Latch pin for shift registerclock- Clock pin for shift registerenable- Output enable pin for shift registerl0,l1,l2,l3,l4- Layer control pins (0-4)
void led(int x, int y, int z)- Turn on a single LED at coordinates (x, y, z)void piano(int z)- Turn on all LEDs in layer zvoid spengi()- Turn off all LEDsvoid spengiCubo()- Turn off the cube (clear buffer)
The library uses a 3D boolean array (tensor) to represent the cube state:
void add(int x, int y, int z)- Add a LED to the tensor at position (x, y, z)void azzeraTensore()- Clear the tensor (set all to 0)void fillPiano(int z)- Fill an entire layer in the tensorvoid getTensore(bool source[][5][5])- Copy tensor from another source
int accendiCubo(long int time)- Display the tensor for specified time (milliseconds)int accendiCubo2(long int time)- Alternative display method with layer switchingvoid sendLayer(int z)- Send a specific layer to the cubeint lampeggiaCubo(int ritardo, int ripetizioni)- Blink the cube
void letteraM(int x, int time)- Display letter "M" at position xvoid letteraI(int x, int time)- Display letter "I" at position xvoid letteraS(int x, int time)- Display letter "S" at position x
void printaTensore()- Print tensor state to Serialvoid printaTensore_piano(int z)- Print specific layer to Serialvoid printaTensore_riga()- Print tensor in row format to Serialvoid printaBuffer()- Print buffer contents to Serial
The Box class allows you to create animated objects that can move through the cube.
Box()Creates a new Box object with its own tensor.
void add(int x, int y, int z)- Add a LED to the Box tensorvoid addCumulativo(int x, int y, int z)- Add LED with cumulative effectvoid azzeraTensore()- Clear the Box tensorvoid move(int x, int y, int z)- Move the Box's single LED to new positionvoid printaTensore_riga()- Print Box tensor to Serial
void sendBox(Box input, Cubong* storage)- Transfer Box tensor to CubongBox somma(Box addendo1, Box addendo2)- Combine two Box objects (OR operation)
The library includes several example sketches in the examples/ folder:
Demonstrates cube blinking with variable delay controlled by analog input.
Displays the letters "MISS" on the cube with variable positioning.
Fills the cube randomly, one LED at a time.
Scans through individual LEDs in sequence.
Cycles through all five layers of the cube.
Similar to SfogliaPiani but starts with empty layers.
Layer cycling with variable speed from analog input.
Demonstrates the tensor system by printing patterns.
Shows how to build patterns layer by layer using the tensor.
Tests the tensor functionality with various patterns.
-
Power Supply: Ensure your power supply can handle all LEDs. At full brightness, 125 LEDs can draw significant current.
-
Refresh Rate: The
accendiCubo()function uses multiplexing. Call it frequently with short time intervals for smooth display. -
Tensor Workflow: The typical workflow is:
- Clear tensor:
cube.azzeraTensore() - Add LEDs:
cube.add(x, y, z) - Display:
cube.accendiCubo(duration)
- Clear tensor:
-
Multiple Objects: Use the Box class to create multiple animated objects that can be combined.
The library uses time-division multiplexing to control the cube:
- Only one layer is active at a time
- The library rapidly cycles through layers (typically 5ms per layer)
- Persistence of vision creates the illusion of all LEDs being on simultaneously
Internally, the library maintains:
- A 32-bit buffer for shift register output
- A 5x5x5 boolean tensor representing the cube state
- Automatic conversion from tensor to buffer format
Contributions are welcome! Please feel free to submit pull requests or open issues for bugs and feature requests.
This project is open source. Please check with the repository owner for specific license terms.
Created by PaperPesto
Note: This library is designed for educational purposes and DIY LED cube projects. For production use, additional optimization may be required.