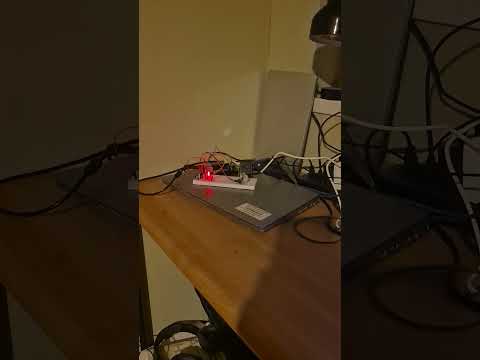
A dual-mode IoT security system with motion detection, live camera streaming, and real-time alerts, built on Raspberry Pi 5 using FastAPI + Vanilla JavaScript. Control lights manually through a web interface OR automatically via motion sensor - with instant intruder notifications and live video feed.





Commercial smart home security systems like Amazon Ring, Google Nest, and ADT have transformed home security, but they come with significant barriers:
| System | Upfront Cost | Monthly Fee | Annual Cost (Year 1) |
|---|---|---|---|
| Ring Security Camera | ~$100 | $4-10/month | ~$150-220 |
| Nest Cam + Hub | ~$200-300 | $6-12/month | ~$270-450 |
| SimpliSafe Basic | ~$250 | $15-28/month | ~$430-590 |
| ADT Professional | ~$500+ | $30-60/month | ~$860-1,220 |
Beyond cost, these systems store video footage and personal data in the cloud, raising privacy concerns about who can access recordings of your home.
This project explores a fundamental question: Can a fully-functional, privacy-respecting smart home security system be built for under $150 using open-source software, with no recurring costs?
| Component | Cost |
|---|---|
| Raspberry Pi 5 (4GB) | ~$60 |
| microSD Card (32GB) | ~$8-10 |
| USB-C Power Supply | ~$12-15 |
| HC-SR501 PIR Sensor | ~$2-3 |
| Red LED + 330Ω Resistor | ~$1 |
| Arducam 8MP USB Camera | ~$25-30 |
| Breadboard + Jumper Wires | ~$5-8 |
| Total | ~$115-130 |
One-time cost. No monthly fees. Full control. All data stays local.
Current Version: v2.0 - Security Camera Update
Last Updated: December 2025
Status: ✅ Complete - All features functional
- ✅ Remote light control via web interface
- ✅ Real-time status updates
- ✅ JWT authentication with secure login
- ✅ Configurable auto-off timer (5s, 10s, 30s, 60s)
- ✅ PIR motion sensor automation
- ✅ USB Camera live streaming (MJPEG)
- ✅ Real-time WebSocket intruder alerts
- ✅ "Intruder Detected" popup with audio alert
- ✅ Camera snapshot download
- ✅ Management CLI for users and database
- ✅ Action history logging
- ✅ HTTPS encrypted communication
- ✅ Responsive mobile-friendly UI
- ✅ Dual control mode (manual + automatic)
| Feature | Description |
|---|---|
| 🎮 Dual Control Mode | Manual web control AND automatic motion detection work simultaneously |
| 🎯 Motion Detection | PIR sensor automatically triggers LED when movement detected |
| 🚨 Intruder Alerts | Real-time WebSocket notifications with popup and sound |
| 📹 Live Camera | MJPEG streaming from USB camera when motion detected |
| 📷 Snapshots | Download camera snapshots on demand |
| 🔴 Status LED | Red LED visual indicator for alerts |
| 🔐 Secure Login | JWT authentication with password hashing |
| ⏱️ Timer Function | Auto-off after configurable timeout (5s, 10s, 30s, 60s) |
| 📜 Action History | Logs all manual and automatic actions with timestamps |
| 📱 Responsive UI | Works on desktop and mobile browsers |
| 🔒 HTTPS | Secure encrypted communication |
PIR Detects Motion
       ↓
LED turns ON (red alert light)
       ↓
WebSocket broadcasts to all connected clients
       ↓
Browser shows "🚨 INTRUDER ALERT" popup + sound
       ↓
User clicks "View Camera"
       ↓
Live MJPEG stream from USB camera
User clicks toggle button on web interface → LED changes state instantly
- PIR motion sensor detects movement → LED turns ON + Alert sent
- No motion detected for timeout period → LED turns OFF automatically
- Configurable auto-off timeout (5-60 seconds)
- Both modes work independently and simultaneously
- Motion sensor activates LED and triggers camera alert
- Manual control always works regardless of motion sensor state
- Web interface shows real-time status via WebSocket
- All actions (manual and automatic) logged with timestamps in database
- FastAPI - Modern Python web framework
- WebSockets - Real-time bidirectional communication
- OpenCV - USB camera capture and MJPEG streaming
- SQLAlchemy + SQLite - Database and ORM
- JWT (python-jose) - Token authentication
- Passlib - Password hashing (bcrypt)
- gpiozero - Raspberry Pi GPIO control
- rpi-lgpio - Raspberry Pi 5 GPIO support
- Vanilla JavaScript (ES6+) - No frameworks, ~30KB
- WebSocket API - Real-time alert notifications
- CSS3 - Responsive styling with animations
- Web Audio API - Alert sounds
- Single Page App - One HTML file, no build process
- ✅ Lightweight - 30KB vs 250MB with frameworks
- ✅ Fast - Instant load, no build step
- ✅ Perfect for IoT - Ideal for devices with limited resources
- ✅ Modern - ES6+, async/await, WebSocket, template literals
| Component | Model | GPIO Pin | Purpose |
|---|---|---|---|
| Microcontroller | Raspberry Pi 5 | - | Main controller |
| PIR Motion Sensor | HC-SR501 | GPIO 27 (Pin 13) | Motion detection |
| Alert LED | 5mm Red LED | GPIO 18 (Pin 12) | Visual alert indicator |
| USB Camera | Arducam 8MP | USB Port | Live video streaming |
| Resistor | 330Ω | - | LED current limiting |
| Breadboard | 400-point | - | Circuit prototyping |
| Jumper Wires | M-M, M-F | - | Connections |
- Raspberry Pi 5 (or Pi 4)
- microSD card (16GB+) with Raspberry Pi OS (64-bit)
- USB Camera (tested with Arducam 8MP)
- Components listed above
- USB-C power supply (5V/3A minimum)
- Raspberry Pi OS (64-bit, Bookworm recommended)
- Python 3.11+
- SSH enabled (for remote access)
- Network connection (Wi-Fi or Ethernet)
VCC (right pin)   → Pi Pin 4 (5V)
Dout (middle pin) → Pi Pin 13 (GPIO 27)
GND (left pin)    → Pi Pin 6 (GND) or ground rail
Pi Pin 12 (GPIO 18) → 330Ω Resistor → Red LED Long Leg (+)
Red LED Short Leg (-) → Pi Pin 6 (GND) or ground rail
Arducam USB → Any USB port on Raspberry Pi
Pi Pin 6 (GND) → Ground rail (-)
PIR GND        → Ground rail (-)
LED Short Leg  → Ground rail (-)
# Clone repository
git clone https://github.com/aqn96/smart-home-light.git
cd smart-home-light

# Run installation script
chmod +x install.sh
./install.sh

# Install additional dependencies for camera
cd backend
source venv/bin/activate
pip install opencv-python-headless==4.9.0.80 numpy==1.26.4# Generate secret key
python3 -c "import secrets; print(secrets.token_hex(32))"
# Create environment file
nano backend/.envAdd to backend/.env:
JWT_SECRET_KEY=<your-generated-key-from-above>
DATABASE_URL=sqlite:///./smart_light.db
BACKEND_HOST=0.0.0.0
BACKEND_PORT=8000
cd backend
source venv/bin/activate
python database.py
deactivate
cd ..cd backend
openssl req -x509 -newkey rsa:4096 -nodes \
-keyout key.pem -out cert.pem -days 365 \
-subj "/CN=smartlight-an.local"
cd ..# Check if camera is detected
ls /dev/video*
# Identify your USB camera
v4l2-ctl --list-devices
# Test camera capture
cd backend
source venv/bin/activate
python3 -c "
import cv2
cap = cv2.VideoCapture(0)
ret, frame = cap.read()
print('✅ Camera works!' if ret else '❌ Camera failed')
cap.release()
"cd backend
./start_https.shExpected output:
🚀 Server started successfully!
💡 Manual toggle control: ACTIVE
🎯 Motion sensor control: ACTIVE
📹 Camera streaming: ACTIVE
🔔 WebSocket alerts: ACTIVE
⏳ PIR calibrating for 60 seconds...
   60 seconds remaining...
   ...
✅ PIR sensor calibrated and ready!
🎯 Motion sensor active and listening...
INFO:     Uvicorn running on https://0.0.0.0:8000
- Web Interface:
https://smartlight-an.local:8000 - API Docs:
https://smartlight-an.local:8000/docs - Alternative:
https://<your-pi-ip>:8000
| Method | Endpoint | Description |
|---|---|---|
| POST | /auth/register |
Register new user |
| POST | /auth/login |
Login and get JWT token |
| POST | /auth/logout |
Revoke token |
| Method | Endpoint | Description |
|---|---|---|
| GET | /light/status |
Get current LED state |
| POST | /light/toggle |
Manual toggle LED |
| POST | /light/timer |
Set auto-off timer |
| GET | /light/history |
View action log |
| Method | Endpoint | Description |
|---|---|---|
| GET | /motion/status |
Get sensor status and calibration |
| POST | /motion/settings |
Update timeout and enable/disable |
| POST | /motion/simulate |
Simulate motion (for testing) |
| Method | Endpoint | Description |
|---|---|---|
| GET | /camera/status |
Get camera availability |
| GET | /camera/stream?token=JWT |
MJPEG live stream |
| GET | /camera/snapshot |
Capture single frame |
| POST | /camera/restart |
Restart camera connection |
| Method | Endpoint | Description |
|---|---|---|
| WS | /ws?token=JWT |
Real-time motion alerts |
smart-home-light/
├── backend/
│   ├── main.py              # FastAPI routes and endpoints
│   ├── database.py          # SQLAlchemy models
│   ├── auth.py              # JWT authentication
│   ├── gpio_control.py      # LED control (GPIO 18)
│   ├── motion_control.py    # PIR sensor logic (GPIO 27)
│   ├── camera_control.py    # USB camera streaming
│   ├── websocket_manager.py # Real-time alert broadcasting
│   ├── manage.py            # CLI tool for user/database management
│   ├── requirements.txt     # Python dependencies
│   ├── start_https.sh       # Server startup script
│   └── .env                 # Environment variables (gitignored)
├── frontend/
│   └── index.html           # Web interface (~30KB)
├── .gitignore               # Git ignore rules
├── .env.example             # Environment template
├── install.sh               # Automated setup script
└── README.md                # This file
Manage users and database from the command line:
cd backend
source venv/bin/activate
./manage.py --help| Command | Description |
|---|---|
./manage.py users list |
Show all users with email and creation date |
./manage.py users add <user> <pass> [email] |
Create a new user |
./manage.py users delete <username> |
Delete a user |
./manage.py users reset <username> |
Reset password (prompts for new password) |
./manage.py users clear |
Delete ALL users (asks confirmation) |
./manage.py history list |
Show recent action history (last 20) |
./manage.py history list all |
Show all action history |
./manage.py history clear |
Delete ALL history (asks confirmation) |
./manage.py db info |
Show database statistics |
./manage.py db reset |
Wipe entire database (asks confirmation) |
./manage.py users list                              # List all users
./manage.py users add john pass123                  # Create user with auto-generated email
./manage.py users add john pass123 john@email.com  # Create user with custom email
./manage.py users reset john                        # Reset password interactively
./manage.py db info # Show user and history countspython3 << 'EOF'
from gpiozero import LED
import time
led = LED(18)
for i in range(5):
led.on()
time.sleep(0.5)
led.off()
time.sleep(0.5)
led.close()
print("✅ LED test complete!")
EOFpython3 << 'EOF'
from gpiozero import MotionSensor
import time
pir = MotionSensor(27)
print("⏳ Calibrating PIR (60 seconds)...")
time.sleep(60)
print("👋 Wave at sensor...")
pir.wait_for_motion()
print("✅ Motion detected!")
pir.close()
EOFpython3 << 'EOF'
import cv2
cap = cv2.VideoCapture(0)
ret, frame = cap.read()
if ret:
print(f"✅ Camera works! Resolution: {frame.shape[1]}x{frame.shape[0]}")
cv2.imwrite("test_snapshot.jpg", frame)
print("📷 Snapshot saved as test_snapshot.jpg")
else:
print("❌ Camera failed")
cap.release()
EOF- Start server:
cd backend && ./start_https.sh - Access web interface:
https://smartlight-an.local:8000 - Login with your credentials
- Check WebSocket: Green dot next to username = connected
- Simulate Alert: Click "Simulate Motion Alert" button
- Verify Popup: "🚨 INTRUDER ALERT" should appear with sound
- View Camera: Click "View Camera" to see live feed
- Real Motion Test: Wave at PIR sensor after calibration
# Install Raspberry Pi 5 GPIO support
sudo apt install -y python3-lgpio liblgpio-dev

# Add user to GPIO group
sudo usermod -a -G gpio $USER
sudo reboot# List video devices
ls /dev/video*
# Identify camera
v4l2-ctl --list-devices
# If camera index is not 0, update camera_control.py:
# Change: camera_controller = CameraController(camera_index=0)
# To: camera_controller = CameraController(camera_index=1)# Check browser console for errors (F12 → Console)
# Ensure you're using wss:// (not ws://) for HTTPS
# Verify token is valid (try logging out and back in)# Check GPIO permissions
groups | grep gpio # Should show 'gpio'
# Verify PIR calibration (wait 60 seconds after power-on)
# PIR sensor needs time to stabilizeThis is normal for self-signed certificates. Options:
- Click "Advanced" → "Proceed anyway" (recommended for local use)
- Or generate CA-signed certificate for production
# Find your Pi's IP address
hostname -I

# Access using IP instead
https://<ip-address>:8000

# Check firewall
sudo ufw status- ✅ Bcrypt password hashing - Passwords never stored in plain text
- ✅ JWT tokens - 1-hour expiration with secure signing
- ✅ HTTPS/TLS encryption - All traffic encrypted
- ✅ WebSocket authentication - Token required for real-time alerts
- ✅ Camera stream authentication - JWT token required
- ✅ SQL injection prevention - Parameterized queries via SQLAlchemy
- ✅ Environment variables - Secrets not committed to Git
- ✅ Local-first architecture - All data stays on your device
Built for: Embedded Systems Course
Date: Fall 2025
Platform: Raspberry Pi 5
- ✅ IoT hardware integration (PIR sensor, LED, USB camera)
- ✅ RESTful API design with FastAPI
- ✅ Real-time communication with WebSockets
- ✅ Video streaming (MJPEG over HTTP)
- ✅ Secure authentication and authorization
- ✅ Full-stack web development
- ✅ GPIO programming on embedded Linux
- ✅ Dual-mode control system (manual + automatic)
Potential additions (not yet implemented):
- ⭕ Relay module for controlling real AC/DC lights
- ⭕ LDR sensor for daylight-aware automation
- ⭕ Multiple PIR sensors for different rooms
- ⭕ Mobile app (React Native or Flutter)
- ⭕ MQTT integration for IoT platform connectivity
- ⭕ Scheduled automation (turn on/off at specific times)
- ⭕ Email/SMS notifications for motion alerts
- ⭕ Motion recording (save video clips on detection)
- ⭕ Cloud storage for snapshots and recordings
- ⭕ Data analytics dashboard for usage patterns
This is a course project, but feel free to fork and extend it! Some ideas:
- Add support for multiple rooms/cameras
- Implement MQTT for IoT platform integration
- Add scheduled automation
- Build a mobile app
- Integrate with voice assistants (Alexa, Google Home)
- Add facial recognition
MIT License - Free to use for learning and educational purposes!
- Built for Embedded Systems Course (Fall 2025)
- Raspberry Pi Foundation for excellent documentation
- FastAPI and Python community for amazing tools
- OpenCV community for computer vision libraries
- gpiozero library maintainers
- GitHub: github.com/aqn96/smart-home-light
- Issues: Report bugs or request features via GitHub Issues
⭐ Star this repo if it helped you learn IoT and embedded systems!
Built with ❤️ on Raspberry Pi 5