Share one Home Assistant dashboard with anyone — read-only, on your own address, with no login.


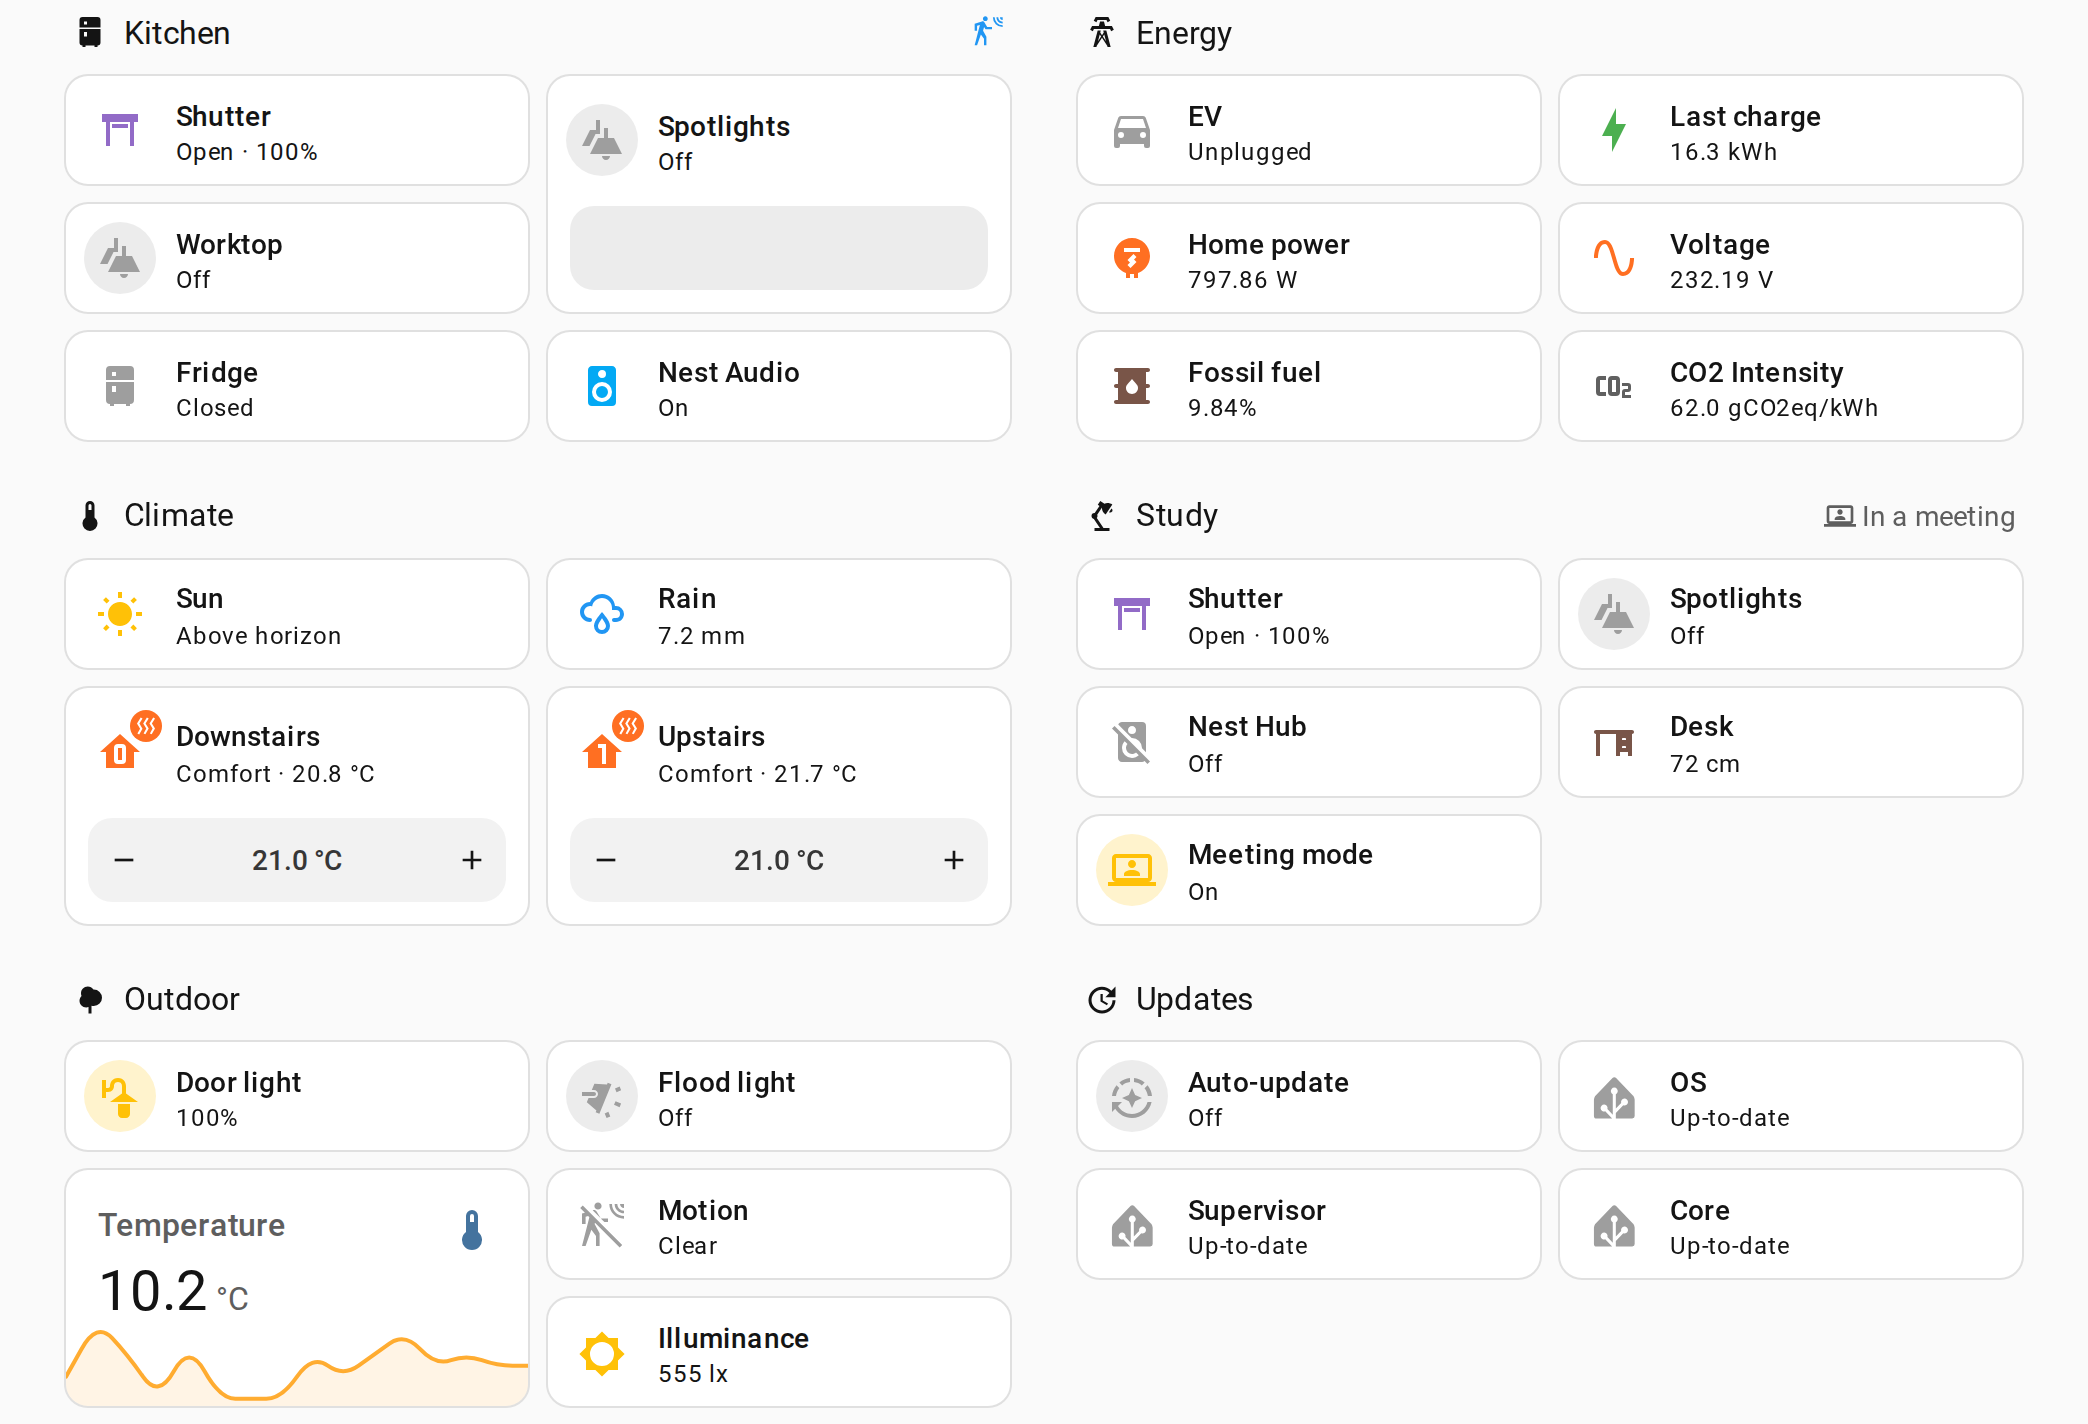
Your solar production for the neighbours, a weather station for the village, a guest screen for a holiday rental: pick a dashboard, give it an address, share the link. Visitors see it live, exactly as you designed it, and cannot change anything in your home. No account, no token, no app.
- Your real dashboard — your theme, your layout, your custom cards.
- Nothing to press — every command, save and script is refused before it reaches Home Assistant.
- Only what you chose — one view of one dashboard; everything else stays private.
Free 5-day trial, then €2.99/month or €30/year → publicaccess.dllfpp.cloud
1. Install. Click the button above, or in HACS open ⋮ → Custom repositories, add
https://github.com/dllfpp/ha-public-access with type Integration, then install Public Access
and restart Home Assistant.
2. Get a key. Ask for a free trial key at publicaccess.dllfpp.cloud. It arrives by email in a minute.
3. Set it up. Settings → Devices & services → Add integration → Public Access. The setup asks four things: your key, the dashboard, the view, and the public address. Then open the address in a private window to see exactly what your visitors see.
Tip: create a dashboard just for the public, with only what strangers may see. Don't publish your main dashboard.
Everything you publish is described by two names. Here is what each one means, with an example.
Say your Home Assistant is at https://home.example.com, and you have a dashboard called
Energy with three tabs at the top: Overview, Solar and Costs.
A dashboard can have several views: the tabs along its top. Public Access publishes exactly one of them. The other tabs, and every other dashboard, stay private — they are not even sent to the visitor's browser.
In the setup you simply pick it from a list, by name: Solar.
Each view also has an address of its own (in the view's settings, URL), which is what Home Assistant uses to find it —
solarin this example, shown next to its name in the list. A view can only be picked if it has one, except the first view of the dashboard.
The public path is the word you add after your Home Assistant address to make the public link. It is the address you give people:
| You choose | Visitors open |
|---|---|
solar |
https://home.example.com/solar |
weather |
https://home.example.com/weather |
The setup shows the link with your real address. Use lowercase letters, digits and underscores, with
no hyphen — every Home Assistant dashboard address contains a hyphen, so a public path without one
can never clash with a dashboard of yours. Paths Home Assistant already uses (config, energy,
history, …) are refused, to keep your own interface intact.
So: the view is the content, the public path is the link. In the example, the Solar tab of
Energy is published at https://home.example.com/solar.
A public page on your home server has to be. Two independent locks make it read-only:
- Only reading is forwarded. The visitor's page talks to Public Access, not to Home Assistant, and only messages that read — states, statistics, the dashboard itself — are passed on. Commands, saves, scripts and templates are refused.
- A read-only user underneath. What is passed on runs as a system user in Home Assistant's own read-only group, so even a message that slipped through would be refused by Home Assistant.
Only the entities the published view actually shows are visible, and no password or token ever reaches the visitor's browser. What is on the view is visible, though: if the view shows a camera or a map, visitors see it — so build the public view on purpose.
The code that enforces this is in this repository, so you can read it before trusting it. What
makes Home Assistant's frontend work behind the glass, and has to follow each frontend release,
arrives with your subscription in a package signed by us; the plugin checks the signature before
using it, and runs it only after the checks above, so it can adapt what a visitor sees but never
widen it.
The tests/ folder holds the automated checks GitHub runs on every change and release —
among them, that the integration contains no code able to write to Home Assistant. Home Assistant
never downloads it: HACS installs only custom_components/public_access.
Chosen in the integration's options (Configure). Almost everyone stays on the default.
| Mode | The visitor gets | Pick it when |
|---|---|---|
| Mirror (default) | Your real dashboard, live, read-only | Almost always — exact layout, custom cards, animations |
| Live | A lighter page drawn by our own renderer from filtered data | You want only known card types, never anything else |
| Snapshot | A picture of the dashboard, refreshed on demand | The visitor's browser must never hold a live connection |
| Option | Default | What it does |
|---|---|---|
| Serve the public dashboard | on | Off: the address answers "not found", as if never configured |
| Dashboard, view to publish | — | What is public |
| Public path | public |
Where it is public |
| Ask search engines not to index it | on | Keeps the page out of Google and friends |
| Include device consumption | on | Off hides the per-device energy breakdown |
| Cache duration | 300 s | How long a page is reused, so visitors never load your database |
Each visitor address is limited to 60 requests a minute.
The setup refuses my key. The message says why. "This instance has already had its free trial" means a trial was already used on this Home Assistant: subscribe with the link in the message and the same key starts working.
The address shows "not found". The integration is switched off in its options, or you changed the public path: a new path starts working after a Home Assistant restart (a notice reminds you).
"This dashboard is not available". The trial or subscription has ended. Your dashboard is not deleted; subscribing brings the page back.
My dashboard is not in the list. Only dashboards saved at least once can be published. Open it, make any change, save.
My view is not in the list. Give it an address: open the view's settings and fill in URL.
The path was refused. It contains a hyphen or is already used by Home Assistant. Pick another word.
The page loads forever. Reload with the cache cleared (Ctrl/Cmd + Shift + R). If it persists, open an issue with your Home Assistant version.
A free 5-day trial — no card — then €2.99/month or €30/year per Home Assistant instance. Payments, VAT and invoices are handled by Lemon Squeezy. When a trial or subscription ends the public page stops; nothing is deleted.
The integration's code is source-available under PolyForm Shield 1.0.0: read it, audit it, run it, modify it for your own use — just don't use it to build a competing product. That is why it is installed as a HACS custom repository rather than from the default store.
Support: GitHub issues. Payments, refunds and personal data: awiteva28@gmail.com.
How the key and the subscription work
The key is checked when you enter it. Once accepted, Home Assistant keeps a signed permission that it verifies on its own, so your page keeps working if our server is briefly unreachable. Our server only ever receives the key, a one-way fingerprint of your Home Assistant instance, and version numbers — nothing about your home. A trial works on one instance; a paid key can move to a new one when you reinstall.
Snapshot mode setup
Snapshot mode needs a small companion that photographs the view on your own machine:
- Settings → Add-ons → Add-on store → ⋮ → Repositories → add
https://github.com/dllfpp/photov-snapshot. - Install Public Access Snapshot. Set
ha_tokento a long-lived access token of a dedicated user, anddashboardto the view's address, e.g.energy-public/solar. Start it. - In Public Access Configure, choose mode Snapshot.
On Home Assistant Container, use the docker-compose.yml of that repository. The companion's browser
only runs during a capture, when a visitor opens the page and the picture is older than the refresh
interval. For a tidy picture use a Sections view with max_columns: 2.
Embedding the page in your own website
Home Assistant forbids framing its pages (X-Frame-Options: SAMEORIGIN), and an integration cannot
change that. Drop the header at your reverse proxy, on the public path only — for Nginx or Nginx Proxy
Manager:
location /your-path {
    proxy_pass http://homeassistant:8123;
    proxy_set_header Host $host;
    proxy_set_header X-Forwarded-For $proxy_add_x_forwarded_for;
    proxy_set_header X-Forwarded-Proto $scheme;
    proxy_hide_header X-Frame-Options;
}
Then set Allowed embedding origins in the options, e.g. 'self' https://www.example.com.
Live mode: supported cards
Live mode draws the page itself from filtered data, so it supports a fixed set of cards; anything else shows as a placeholder. Mirror and snapshot modes show every card, custom ones included.
| Category | Cards |
|---|---|
| Text and layout | markdown, heading, grid, vertical-stack, horizontal-stack |
| Current values | tile, entities, glance, gauge, sensor |
| Charts | statistics-graph, history-graph, statistic |
| Energy | all energy cards, including energy-sankey and energy-date-selection |
Security details and reporting a vulnerability
The allowlist of forwarded messages is in
mirror.py and the live-mode sanitizer in
sanitize.py. The test suite checks, among other
things, that the package contains no write-capable call, that a missing view publishes nothing rather
than another view, and that the owner's default dashboard never reaches the visitor.
Please report a vulnerability privately through the repository's Security → Report a vulnerability, not in a public issue.
Development
git clone https://github.com/dllfpp/ha-public-access.git
cd ha-public-access
python -m pytest tests -q
Copy custom_components/public_access into your config/custom_components/ and restart Home
Assistant to try a change.
Not affiliated with the Home Assistant project, the Open Home Foundation or Nabu Casa.