Native Python Home Assistant integration for USB-connected NetMD players and recorders. No netmdcli process or bundled executable is used.
This setup creates a remote controllable stream on http://homeassistant.local:8888/live.mp3 that you can use as Radio Station inside your Music Assistant instance or any other media player you want to use.
The integration provides playback, track selection, seeking, disc and track metadata, capacity sensors, and actions for renaming, moving, playing, and deleting tracks. Track numbers in action data start at 1. Audio transfer only works via Line-In of a sound card as the NetMD-Protocol does not allow direct streaming of audio.
Rename a track on the inserted MiniDisc.
Target: Target NetMD Device or media_player entity.
Track Number: Track to be renamed. Track numbers start at 1.
Title: New Title of the Title.
Rename the inserted MiniDisc while preserving its group metadata.
Target: Target NetMD Device or media_player entity.
Title: New Title of the MiniDisc.
Move a track to another position.
Target: Target NetMD Device or media_player entity.
Source Track Number: Source Track number. Track numbers start at 1.
Destination Track Number: Destination Track number. Track numbers start at 1.
Permanently delete a track from the inserted MiniDisc.
Target: Target NetMD Device or media_player entity.
Track Number: Track to be deleted. WARNING! This cannot be made undone! Track numbers start at 1.
Select and play a track.
Target: Target NetMD Device or media_player entity.
Track Number: Track to be played. Track numbers start at 1.
Start fast-forwarding the current track on the inserted MiniDisc.
Target: Target NetMD Device or media_player entity.
Start rewinding the current track on the inserted MiniDisc.
Target: Target NetMD Device or media_player entity.
Integrate https://github.com/dreimer1986/HA-NetMD as repository for an Integration into HACS and install HA-NetMD with HACS.
Copy the complete netmd directory to /config/custom_components/netmd, restart Home Assistant, connect the NetMD device over USB, and add NetMD under Settings → Devices & services.
- Home Assistant OS normally exposes the USB bus to Core automatically.
- Container installations must pass
/dev/bus/usbthrough to the Home Assistant container.
This automation waits for the NetMD media_player entity to start playback or come online. If this happens it starts the FFmpeg stream.
This automation waits for the NetMD media_player entity to stop playback or become offline. If this happens it stops the FFmpeg stream.
Only needed if your pulse audio sink switches back to microphone port as default after reboot.
Only needed if your line-in volume needs to be set back to 70% after reboot.
The last two are only there for reference. I don't need them anymore after I used both once.
This switch controls the running as background process FFmpeg with the sound card's line-in as input and the URL on port 8888 as stream in MP3 format as output. To allow more than one connection and stay alive when the stream is stopped for a short while a Python script is now creating a asynchronous web server that hosts the FFmpeg conversion via pipe.
This sensor outputs the last line of the debug log the stream service creates. Thus you can follow problems showing up by checking this sensor.
This sensor outputs if the FFmpeg process is running or not. It verifies this by checking if the PID that was logged when FFmpeg was started is still active or not.
"alsa_input.usb-0d8c_USB_Sound_Device-00.analog-stereo" is the name of the line-in audio input sink in my case. You need to find your own line-in first. For that "pactl list | less" is your best friend. Look for the name of your own line-in device and replace it on the commands.
If you want to be able to change the default input and volume by shell_command at all, you need to abuse SSH for tinkering from one Docker inside another:
mkdir -p /config/.ssh
cd /config/.ssh
ssh-keygen -t rsa -b 4096 -f /config/.ssh/id_rsa -N ""
chmod 700 /config/.ssh
chmod 600 /config/.ssh/id_rsa
chmod 644 /config/.ssh/id_rsa.pub
Now you can use the shell commands I made for that.
The most effective way to play the MiniDisc contents with this Addon would be Music Assistant.
-
Install the Home Assistant App from the integrated App Store and configure it to your wishes. The app has dozes of ways to connect to whatever playback options you have in your network. Of course you can use the web browser you use right now to set it up as playback option, too.
-
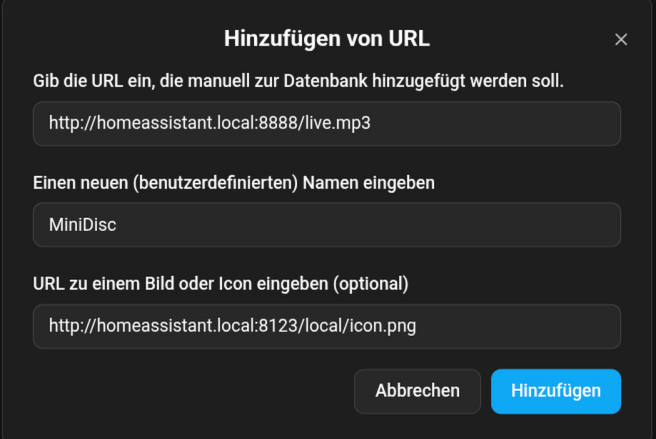
To have a nice logo for the Stream you first copy /homeassistant/custom_components/netmd/brand/icon.png to /homeassistant/www/icon.png. This will be needed later in the process.
-
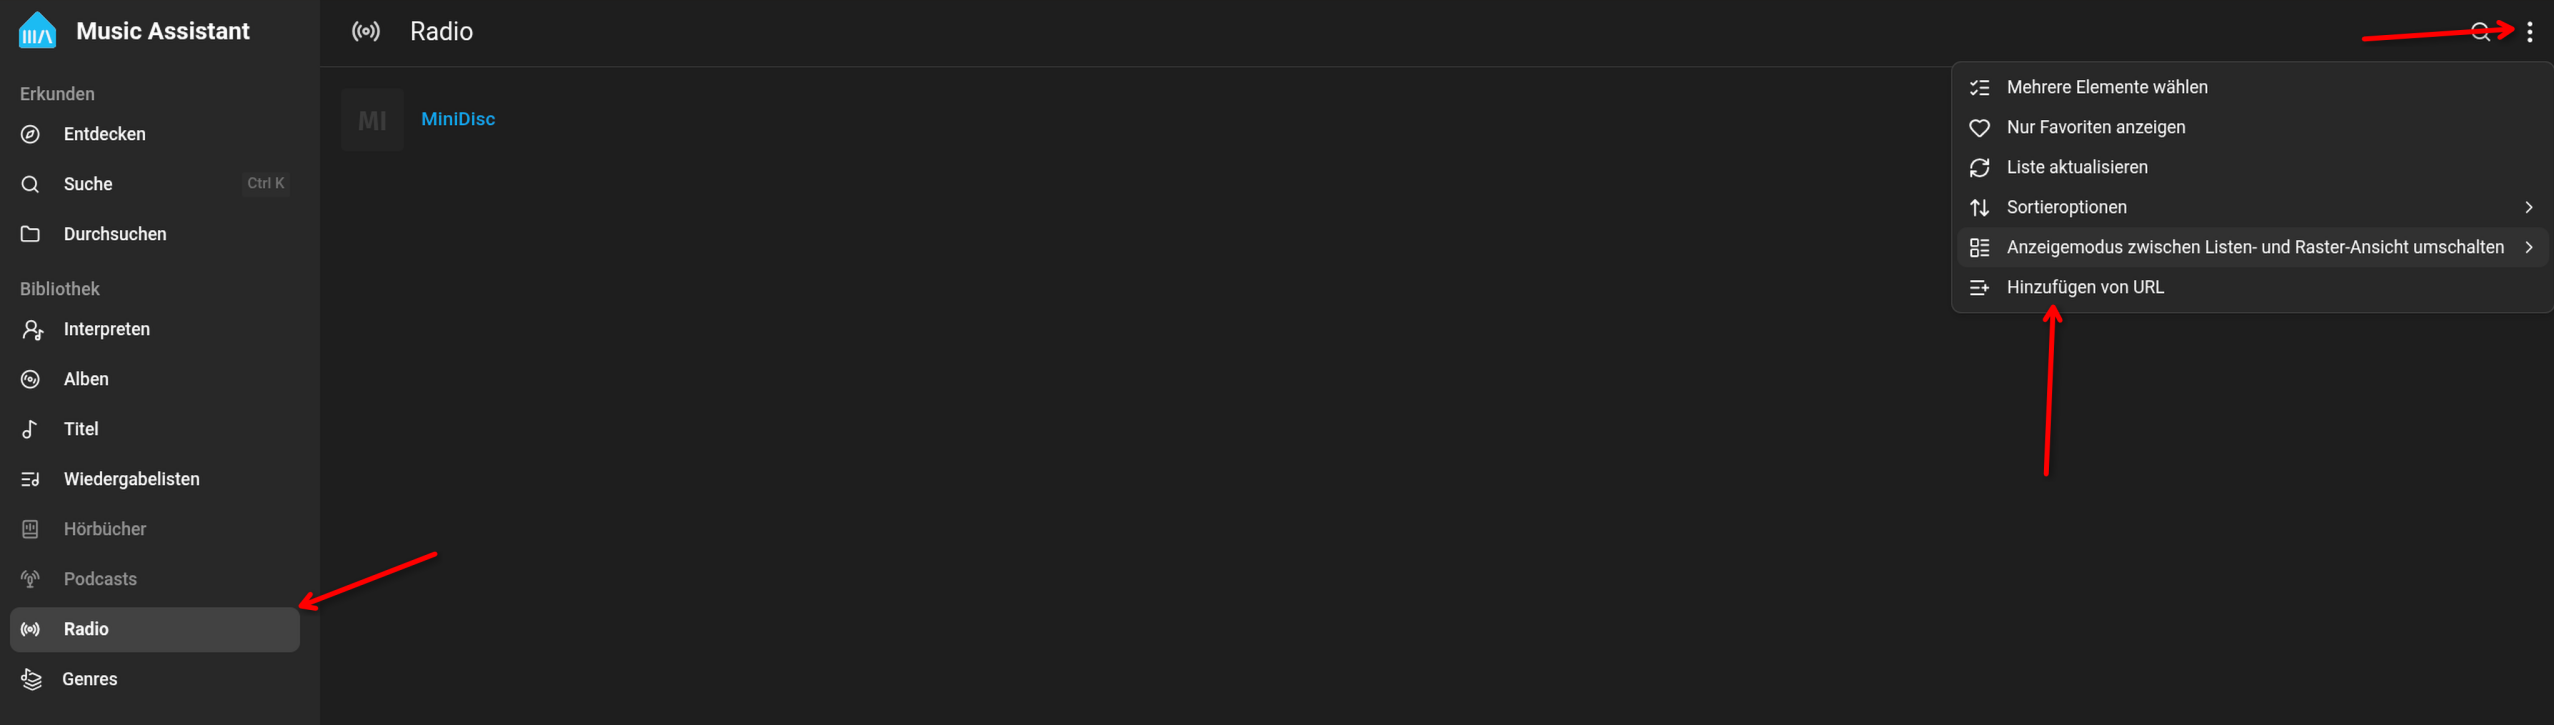
The Addon sets up a music stream as already explained above. Thus we need a way to connect to this stream. In Music Assistant you need to look for the menu item "Radios". Then the three dots in the top right corner and in the menu there you need to click on "Add by URL".
- In the following window you add the settings and path the following way:
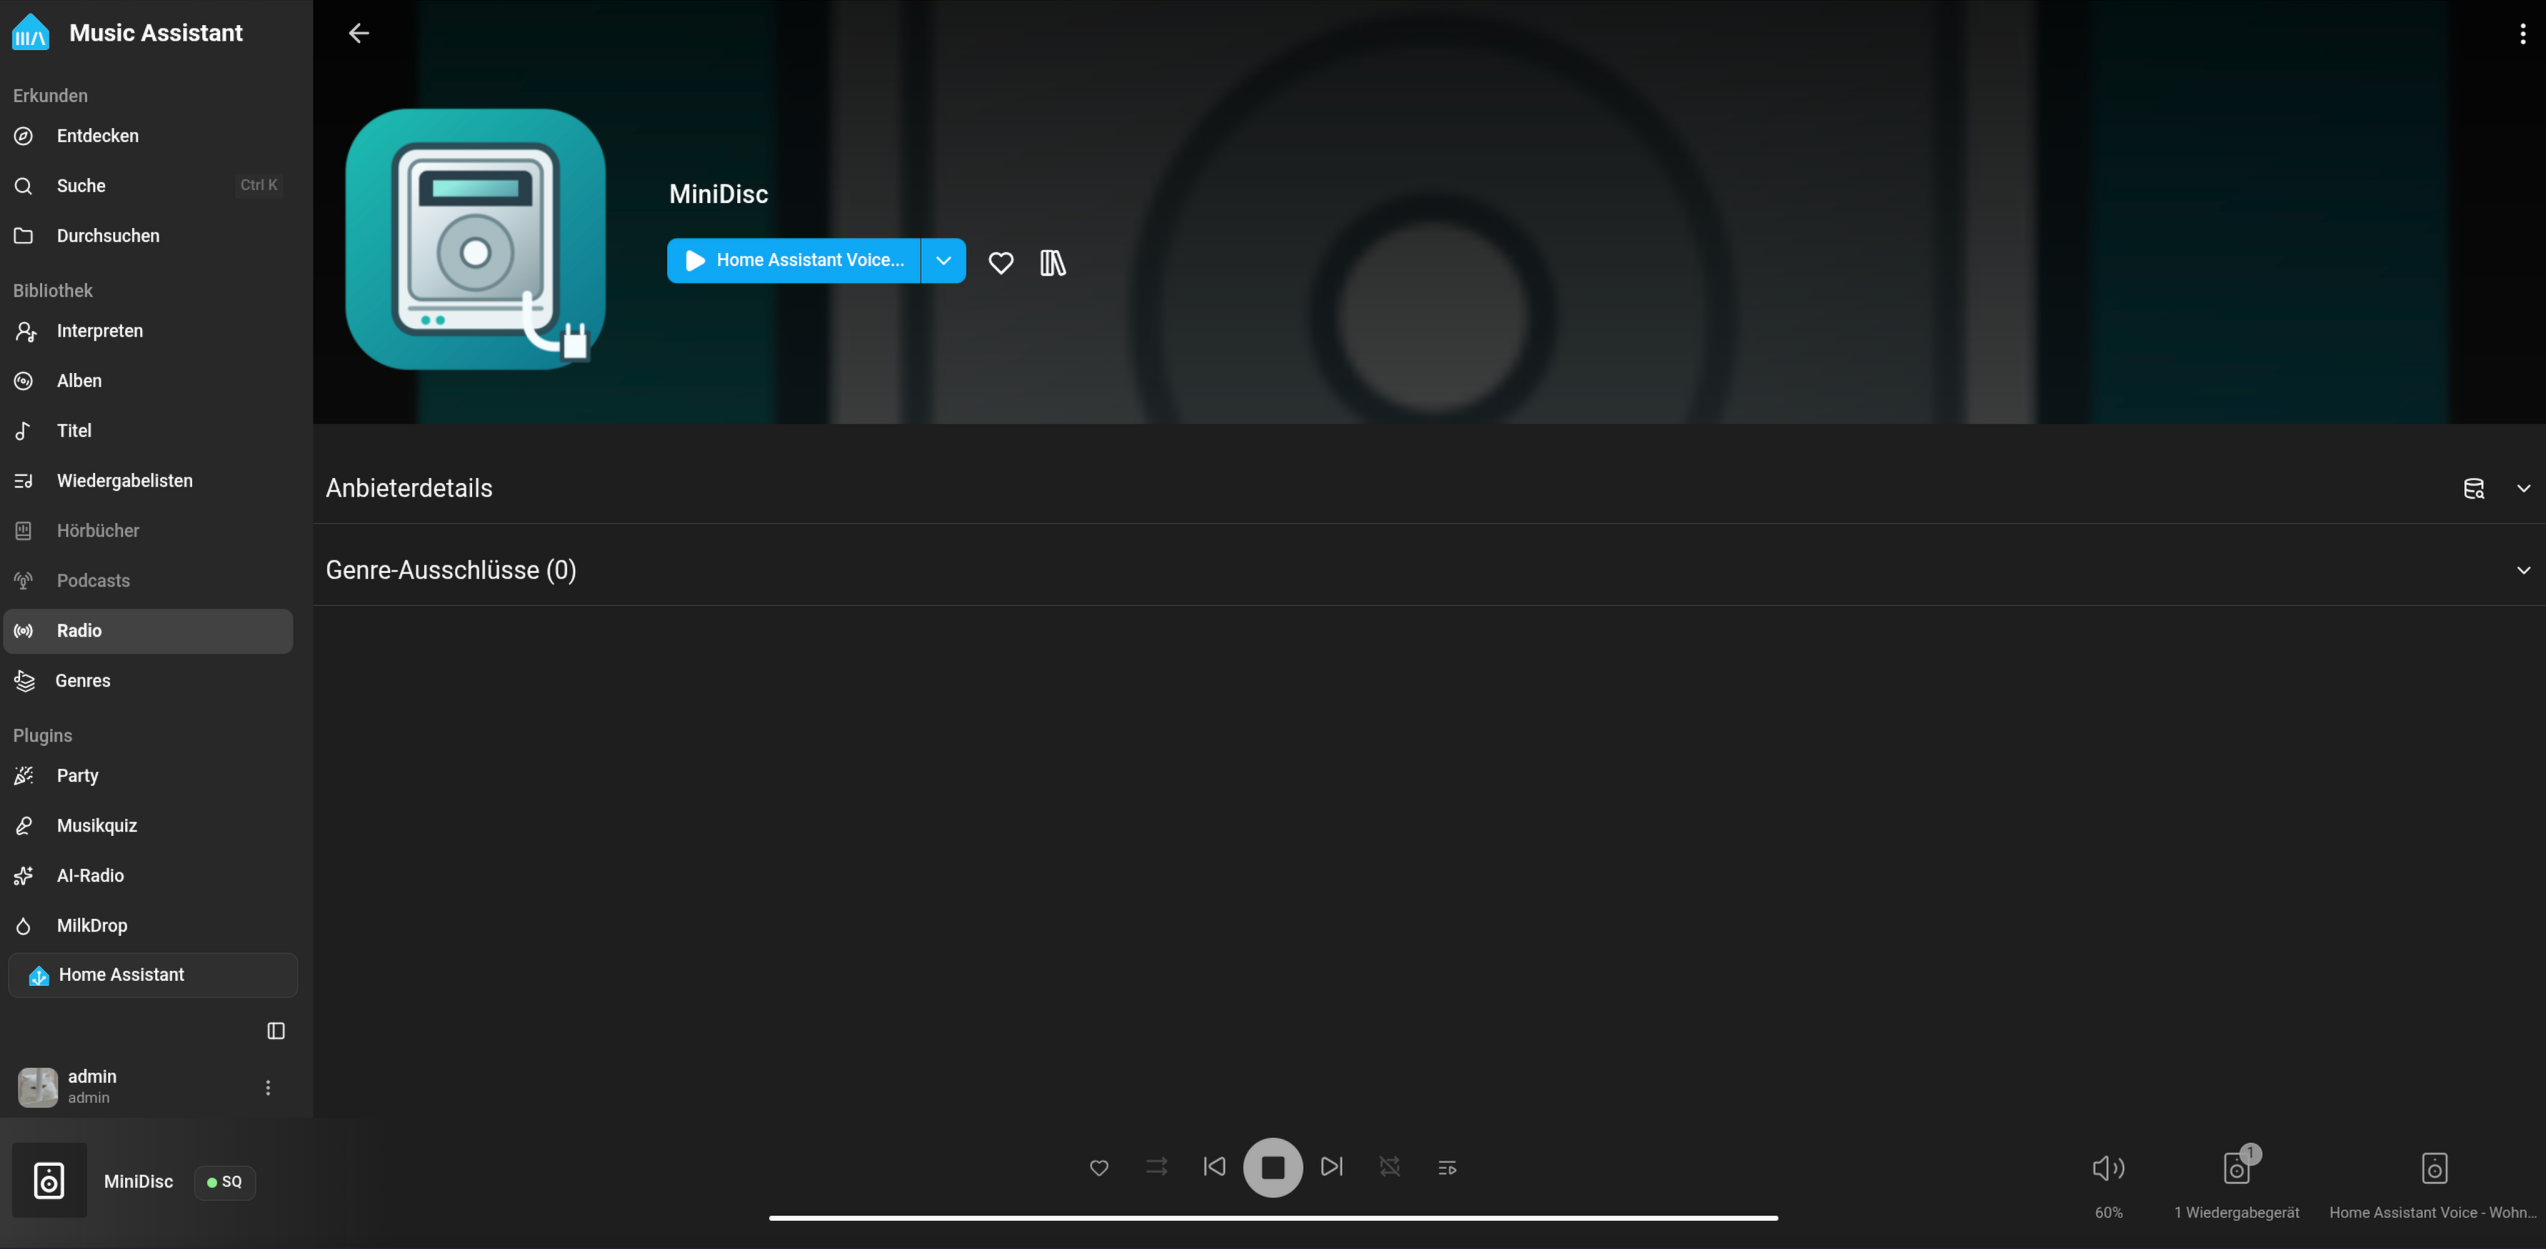
- Now the Radio Stream is fully setup and can be selected as source for whatever plackback option you have available. This works on the official Music Assistant App for playback, it was tested in Android Auto and CarPlay, too.
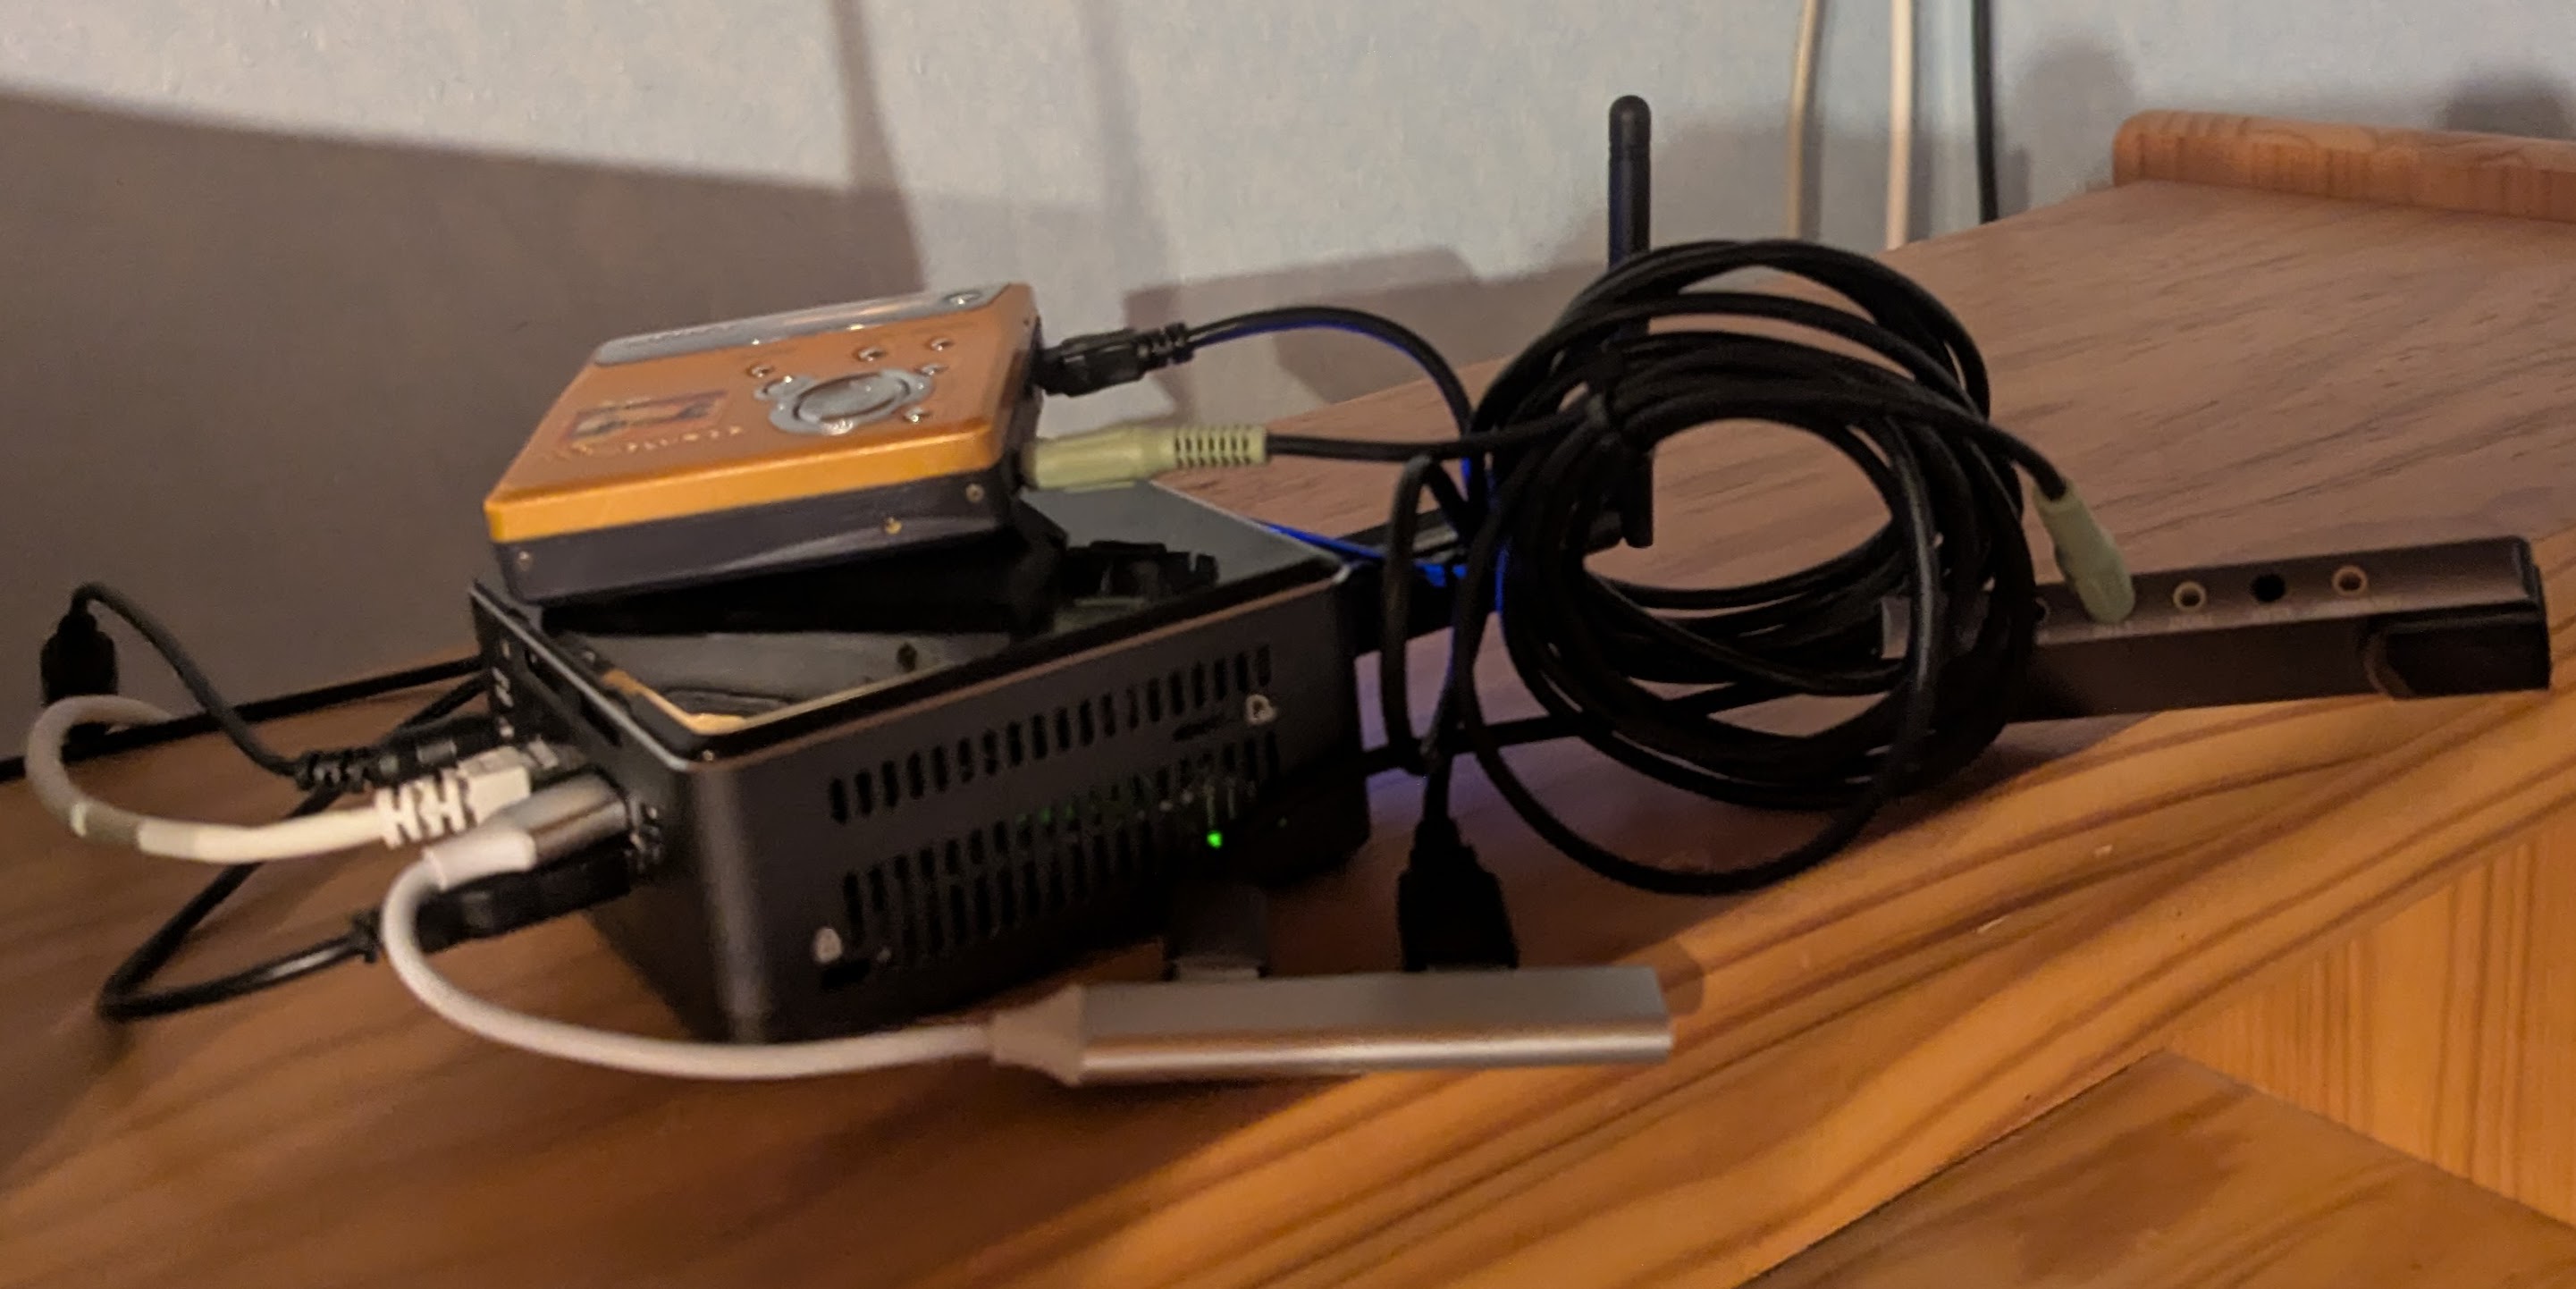
My Home Assistant Server based on a NUC7I7BNB, a CC2652 Dev board for Zigbee, a USB Sound Card and a Sonoff Zigbee USB Dongle for Matter/Thread
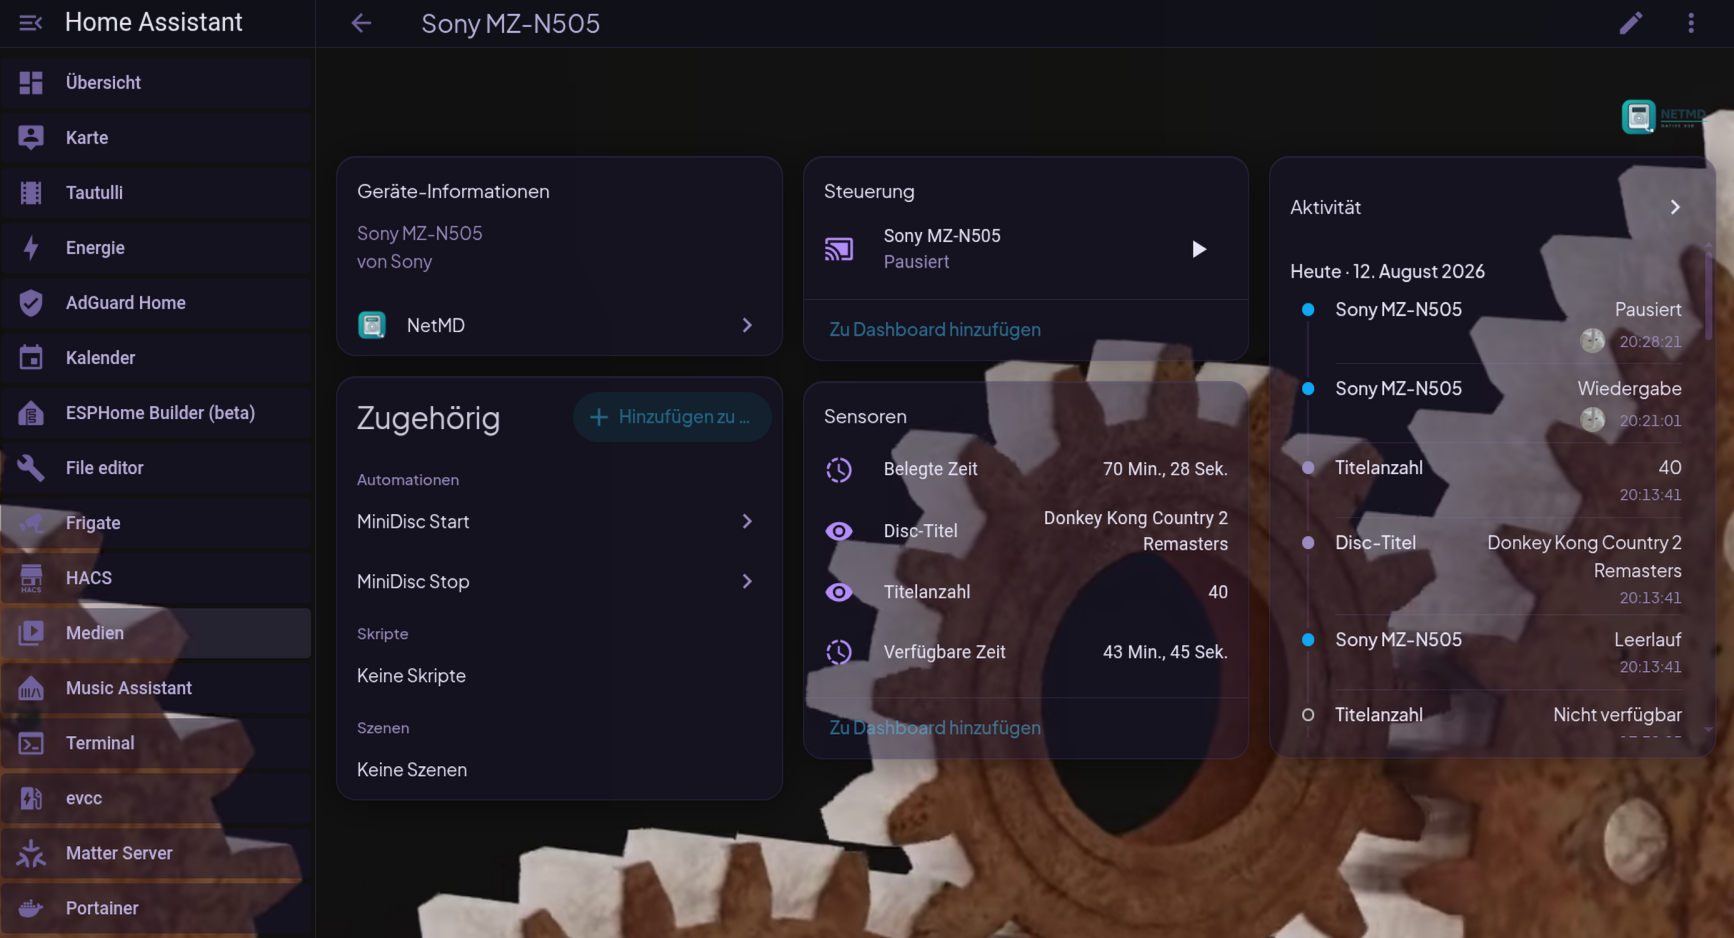
The Add-On running inside Home Assistant.
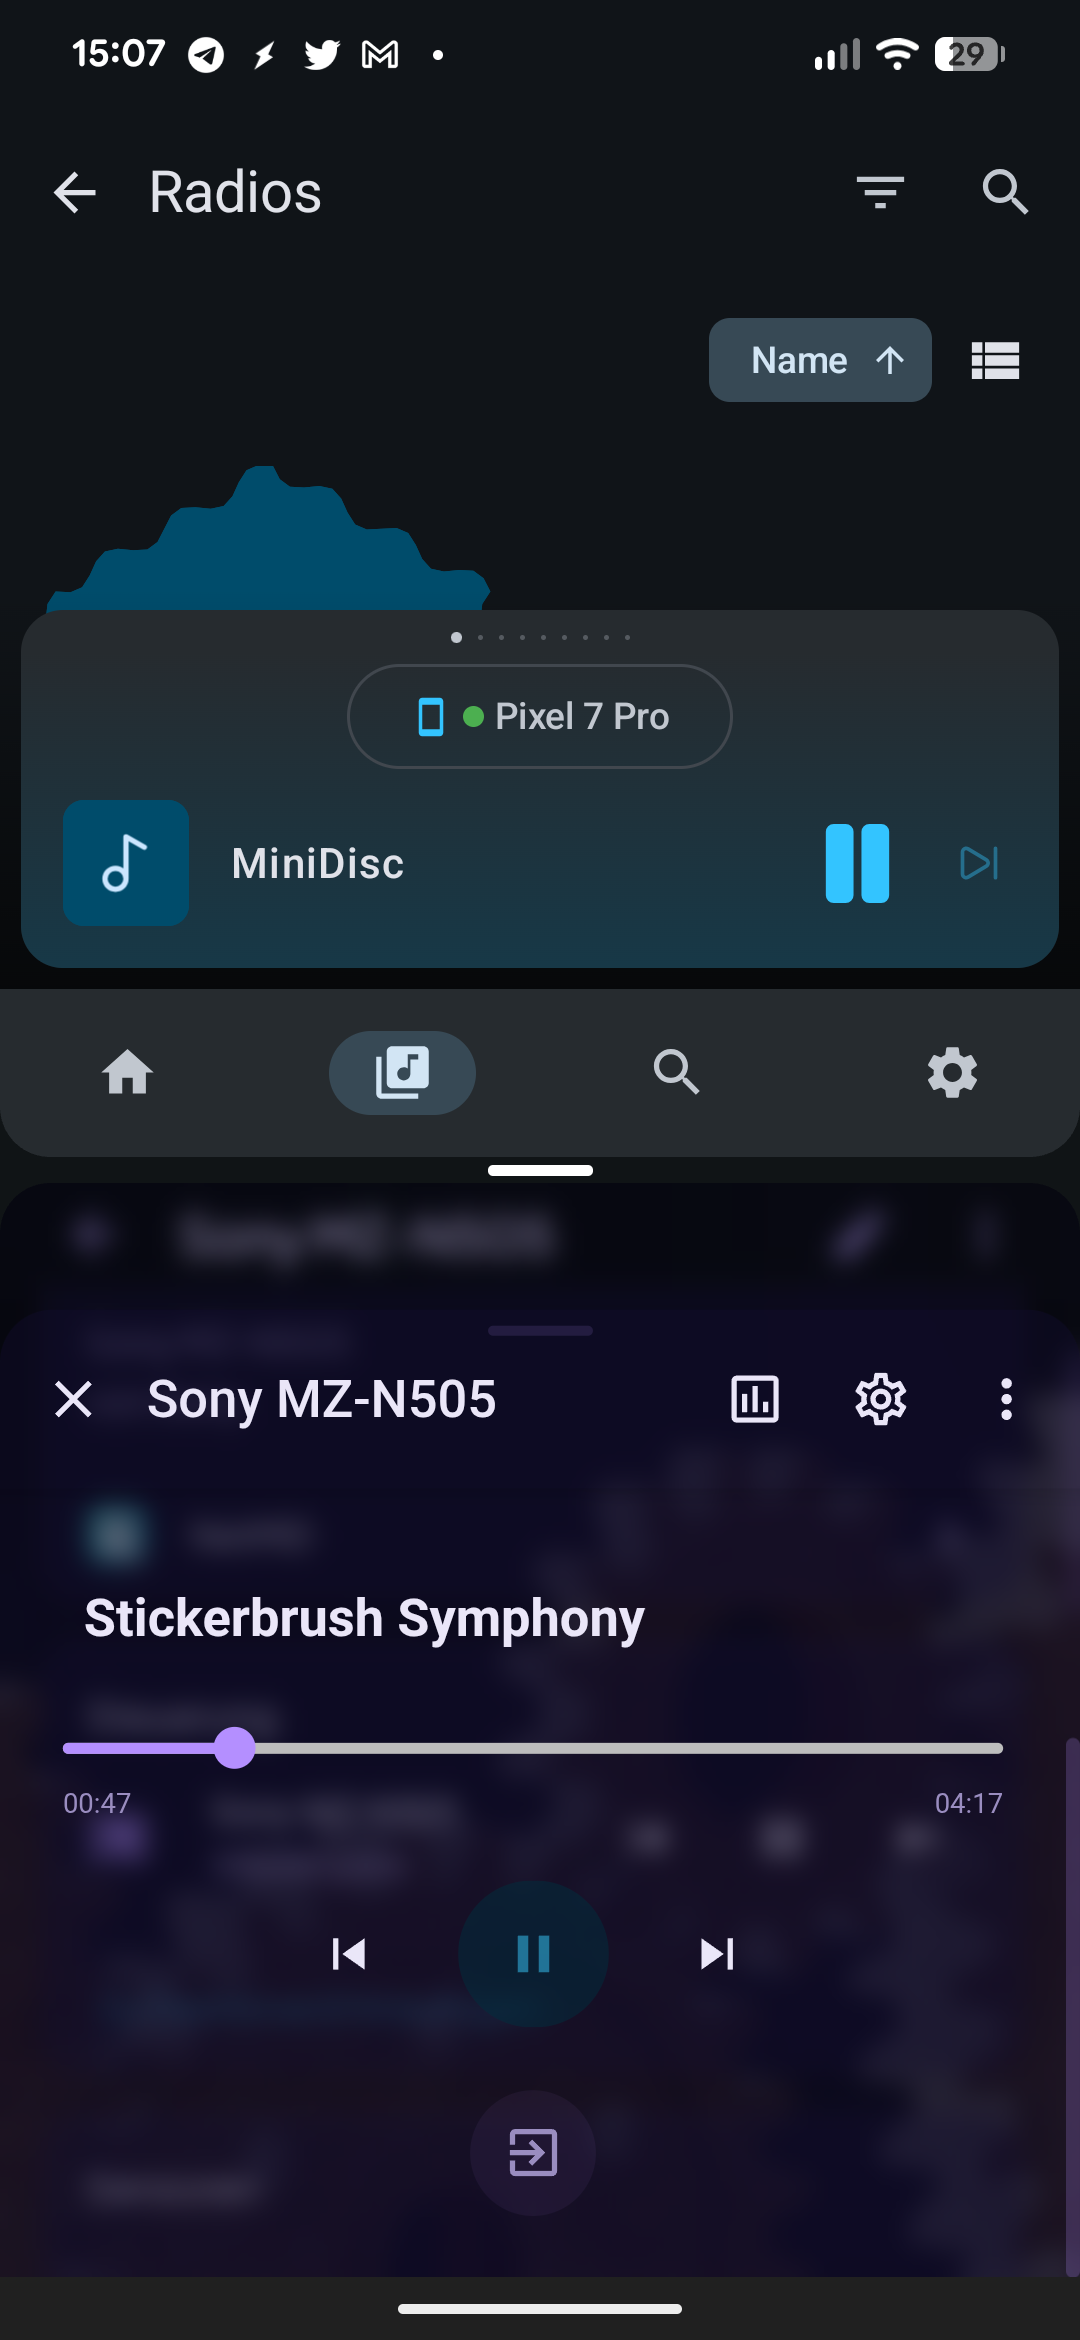
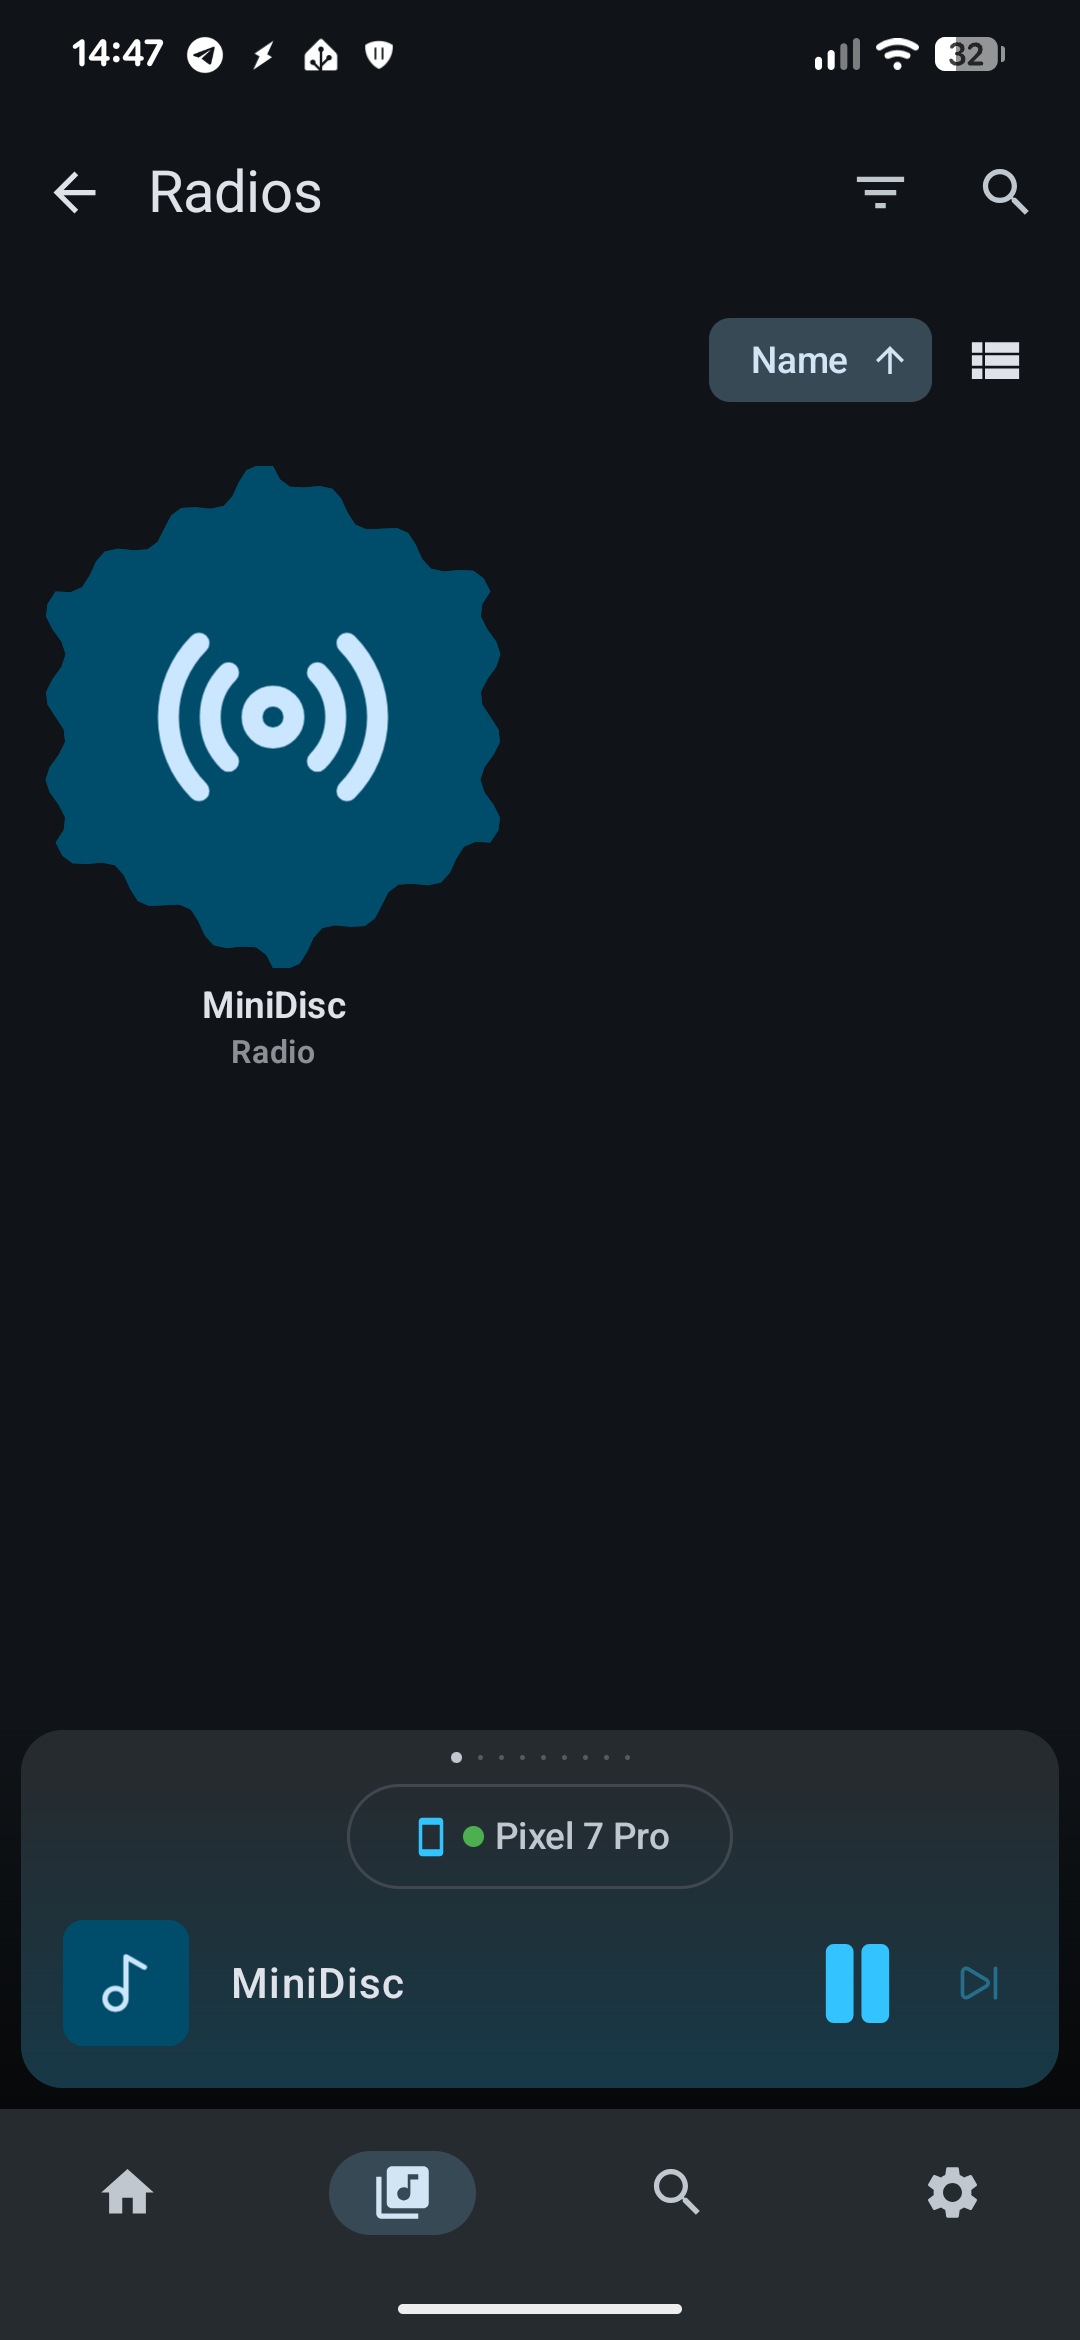
Pics from usage on my Pixel 7 Pro:
Listening to the Add-On's stream inside Music Assistant.
Splitscreen: Controlling the current track being played back via Home Assistant app (below) and listening to the Add-On's stream inside Music Assistant (above)