Note: This is a fork of the original cams repository with enhanced ONVIF features including automatic stream discovery and touch-based PTZ control.
Package ID: uk.org.retallack.onvifcamera
Original Package: com.vladpen.cams
This fork can be installed alongside the original Cams app without conflicts.

Simple Android mobile application for playing RTSP streams from IP cameras.
Features:
- View RTSP streams from any IP cameras, including H.265+.
- Simultaneous viewing of multiple streams.
- 20x image zoom.
- Support for dual-channel cameras.
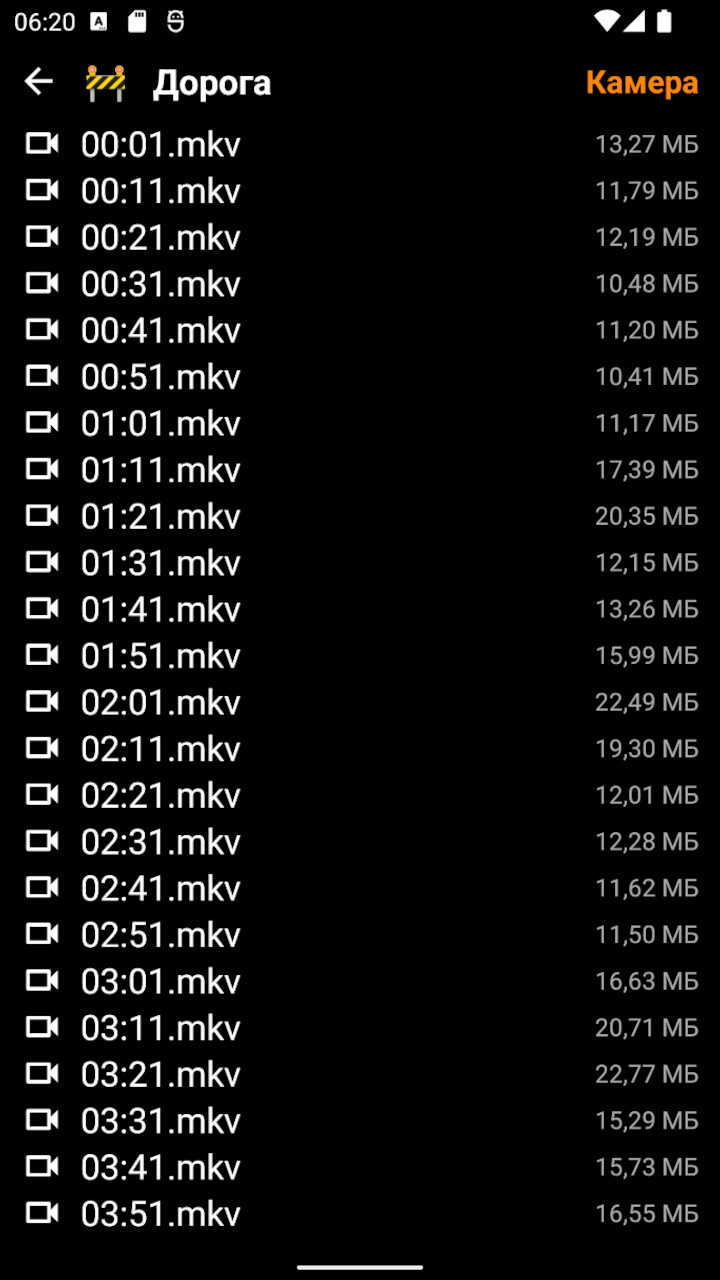
- View video recordings or images via SFTP protocol.
- Motion detection alerts configuration.
- High connection speed.
- Extremely simple navigation and control.
- Maximum security and data privacy.
- TCP/UDP protocol switching. This option is important when viewing cameras over the internet, where UDP may not be supported or work poorly.
- ONVIF PTZ Control: Touch-based pan, tilt, and zoom control for ONVIF-compatible cameras.
- ONVIF Device Discovery: Automatic detection of ONVIF cameras on the network.
- Touch Gesture Control: Intuitive touch-based PTZ control with visual feedback.
The application is written for joint use with the python-rtsp-server server, but works perfectly standalone thanks to the ability to connect to any IP cameras, as well as video recorders that support SFTP.
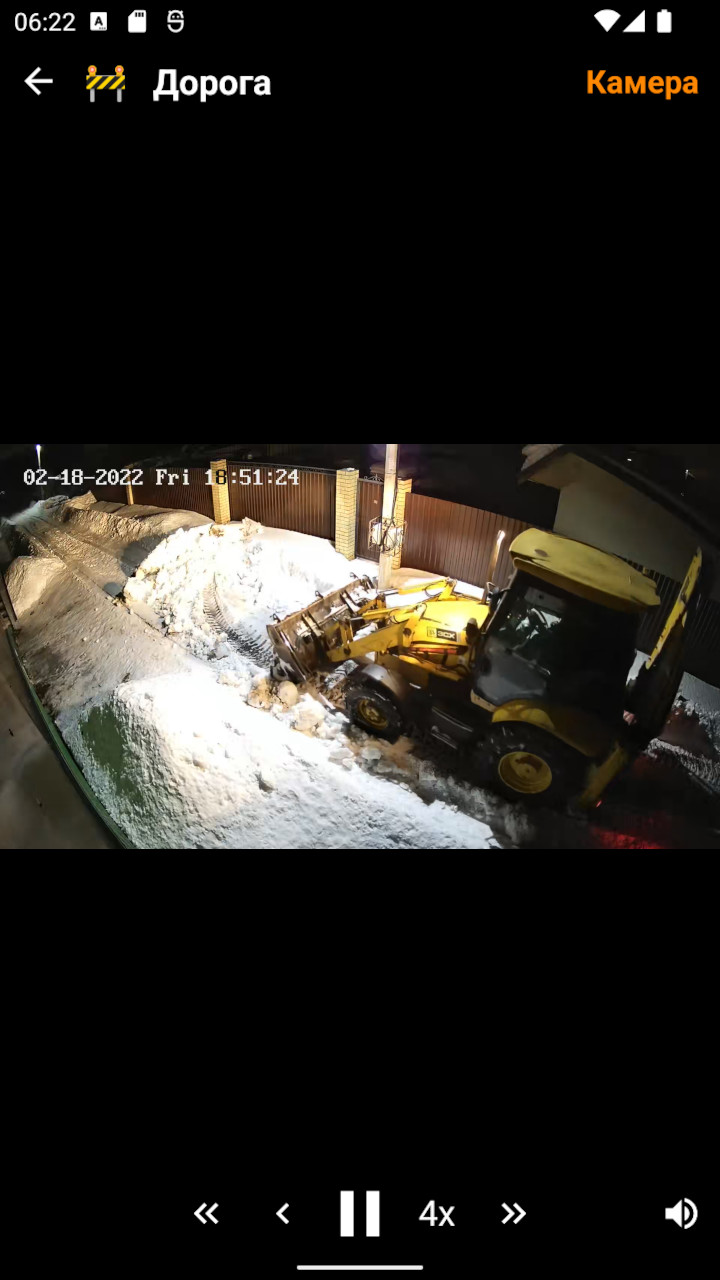
Plays most types of video streams (not just RTSP). The screenshot above shows an image from a real video camera and three test videos in "Group" mode.
The app uses VLC for Android (libvlc) as its video playback engine, providing:
- Support for RTSP, RTMP, HTTP, and other streaming protocols
- Hardware-accelerated H.264, H.265/HEVC video decoding
- Low-latency streaming optimized for IP cameras
- Robust network error handling and reconnection
- Multi-format codec support
VLC library is obtained from Maven Central: org.videolan.android:libvlc-all:3.6.5
License: LGPL 2.1+ / GPL 2.0+ - See VideoLAN Legal
IMPORTANT. The application is focused on security and data privacy, so it does not collect or process any user information. Data is not sent to any servers, including Google's technical infrastructure and manufacturers' "cloud" storage.
APK file can be built yourself, downloaded from Github, installed using F-Droid (32-bit platforms only) or RuStore. Supports armeabi-v7a architecture (used in most modern mobile phones), arm64-v8a, x86-64 and x86.
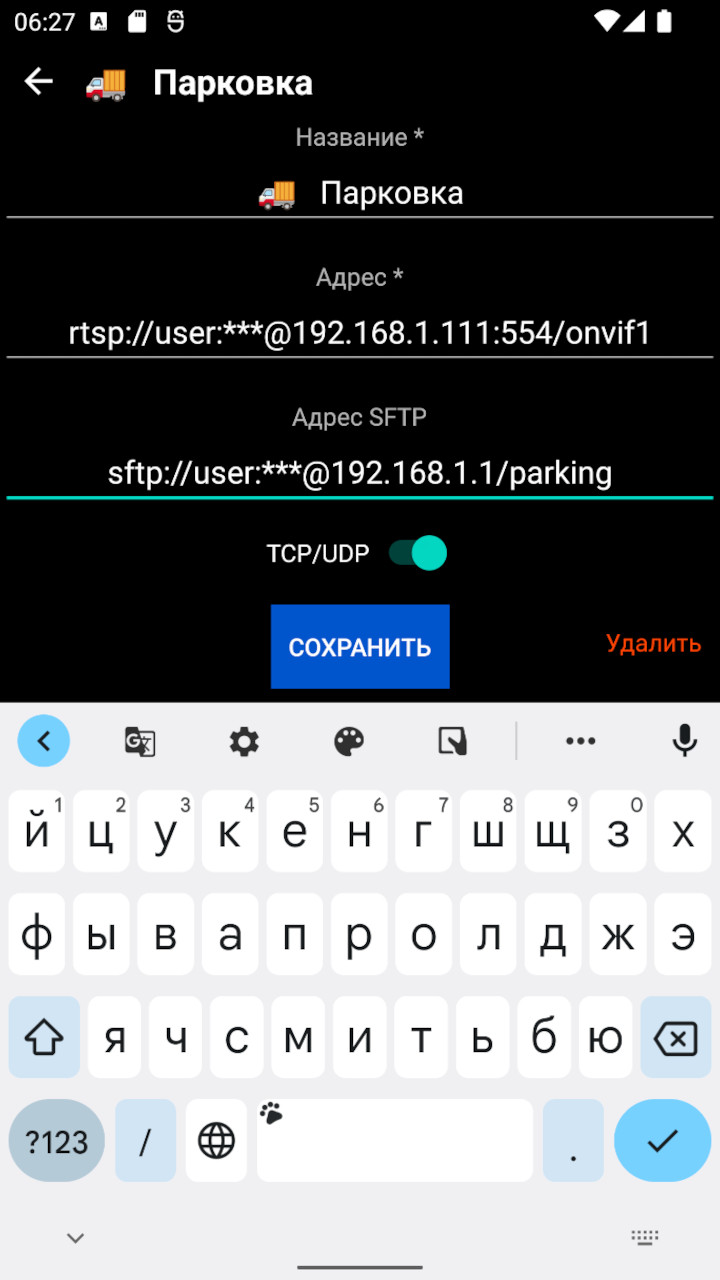
To connect to a video camera, you need to enter its URL in the "Address" field as specified by the manufacturer. Usually it looks like this:
[rtsp://][<user>:<password>@]<IP>[:<port>][/<path>]
Parameters in square brackets are optional (depends on camera settings).
For dual-channel cameras, you can additionally specify the address of the second channel. For example, for Hikvision cameras and their derivatives, the path will look like this:
ISAPI/Streaming/Channels/<channel number>
Then the first channel (high resolution) will have number 101, and the second (low resolution) — 102.
Low resolution channels can be used to speed up image loading, to save traffic and to reduce device processor load. This is especially convenient for viewing groups of cameras at low connection speeds. During playback, channels can be switched using the K1/K2 button in the lower right corner of the screen. On camera group screens, K2 is used by default.
Also, to reduce load, playback of cameras that go beyond the screen boundaries when zooming is paused.
SFTP server or video recorder address looks like this:
[sftp://]<user>:<password>@<IP>[:<port>][/<path>]
WARNING! It is strongly not recommended to use administrator access credentials. For SFTP server, it's better to create chroot, for example, as described here.
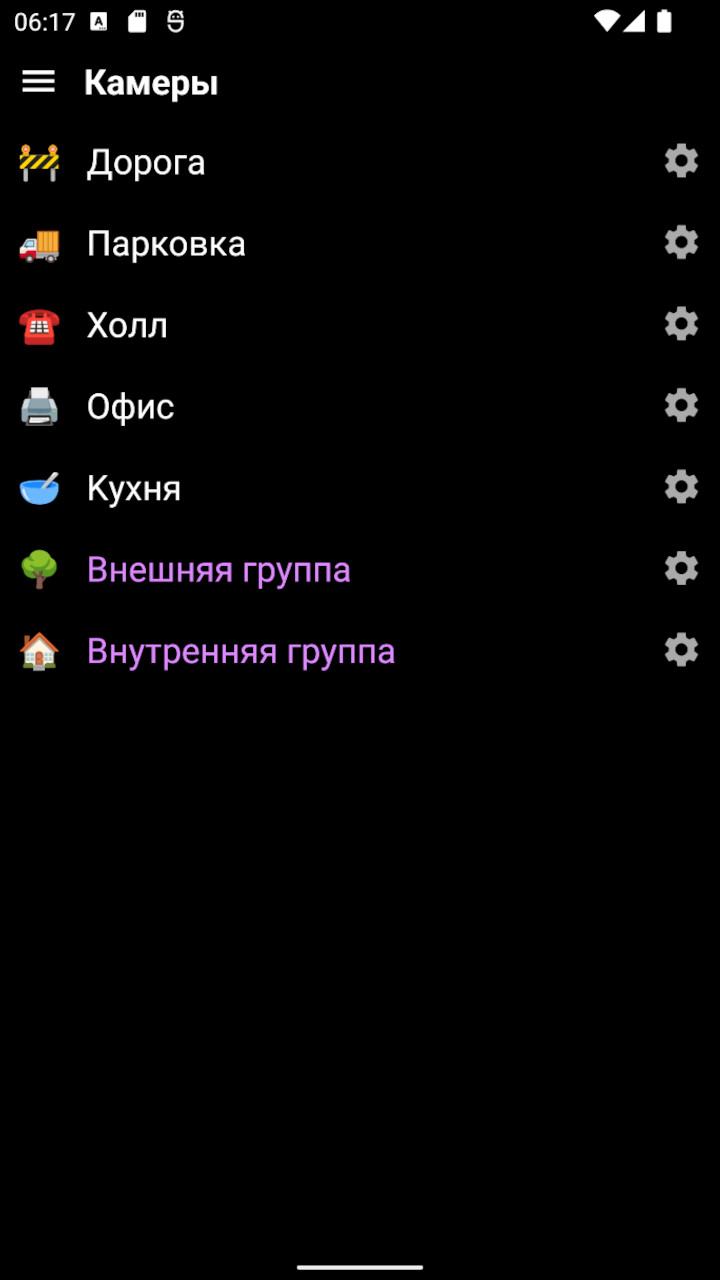
Tip: you can use emoji as icons in camera names. For example, the screenshots above use icons from the standard mobile phone set.
This fork includes enhanced ONVIF support for automatic camera discovery, stream configuration, and PTZ control.
- Tap "Add Camera" in the main screen
- Enter a camera name
- Tap "Add ONVIF Configuration" to show ONVIF fields
- Enter your ONVIF URL in the format:
Example:
onvif://username:password@camera-ip:port/onvif/device_serviceonvif://admin:password123@192.168.1.100:80/onvif/device_service - Wait 1 second - the app will automatically discover and populate RTSP stream URLs
- Tap "Save"
If automatic discovery fails, you can still manually enter RTSP URLs:
- The ONVIF URL is optional
- Enter RTSP URLs directly in the "Address" fields
- ONVIF PTZ control will still work if ONVIF URL is provided
Different cameras use different ONVIF service paths:
- Most cameras:
/onvif/device_service - Some cameras:
/onvif/media_service - Thingino cameras:
/onvif/device_service
The app automatically tries multiple endpoints to find the correct one.
For ONVIF cameras with PTZ capabilities:
- Touch the center of the video screen to activate PTZ control
- Drag your finger to pan and tilt the camera
- Variable Speed: Movement speed scales with distance from center
- Near center: Slow, precise control (10% speed)
- Medium distance: Moderate speed (up to 50%)
- Far from center: Fast movement (up to 100% speed)
- The PTZ dot follows your finger movement with visual feedback
- Release to stop movement - the dot smoothly returns to center
- Per-camera settings for PTZ inversion and rate limiting
- Works in fullscreen landscape mode for optimal control
In the camera edit screen, you can configure:
- Invert Horizontal PTZ: Reverse left/right movement direction
- Invert Vertical PTZ: Reverse up/down movement direction
- PTZ Rate Limit: Minimum milliseconds between PTZ commands (default: 200ms)
These settings are saved per-camera and persist across app restarts.
When you enter an ONVIF URL, the app automatically:
- Connects to the camera's ONVIF service
- Discovers available media profiles
- Selects the highest quality profile for primary stream
- Selects a secondary profile for dual-channel support (if available)
- Retrieves RTSP URLs for both streams
- Auto-populates the RTSP URL fields
This eliminates the need to manually find and enter RTSP URLs for ONVIF cameras.
- Automatic Stream Discovery: GetProfiles and GetStreamUri for RTSP URL detection
- Device Discovery: WS-Discovery protocol for automatic camera detection on network
- Touch PTZ Control: Intuitive gesture-based pan, tilt, and zoom with variable speed
- Per-Camera Settings: Individual PTZ inversion and rate limiting configuration
- Profile S Compliance: Compatible with ONVIF Profile S cameras
- Secure Authentication: WS-UsernameToken and HTTP Digest authentication
If automatic discovery fails:
- Verify the ONVIF URL format is correct
- Check that ONVIF is enabled on your camera
- Ensure the username/password are correct
- Try different ONVIF endpoints (
/onvif/device_servicevs/onvif/media_service) - Check network connectivity between phone and camera
- Manually enter RTSP URLs as fallback
Thingino cameras have specific ONVIF requirements:
PTZ Control:
- Thingino firmware (as of recent updates) only supports RelativeMove for PTZ control
- ContinuousMove is no longer supported - the camera accepts commands but doesn't execute them
- The app automatically uses RelativeMove for all Thingino cameras
- PTZ commands must use the hostname (not IP address) for proper operation
- PTZ endpoint is
/onvif/ptz_service(discovered via GetCapabilities)
Stream Discovery:
- RTSP URLs returned by GetStreamUri do not include credentials
- The app automatically injects ONVIF credentials into discovered RTSP URLs
- Use the hostname in your ONVIF URL (e.g.,
onvif://user:pass@camera.local:80/onvif/device_service) - The camera may return IP addresses in GetCapabilities responses, but PTZ requires using the original hostname
Common Issues:
- If PTZ doesn't work, ensure you're using a hostname (not IP) in the ONVIF URL
- If streams don't authenticate, the app will automatically add credentials from ONVIF URL
- After firmware updates, PTZ behavior may change - RelativeMove is currently the only supported method
Optionally, the application can notify about camera motion detector triggers. Alerts are triggered when a new image from the camera appears in the specified SFTP server folder. For this function to work, you need to configure cameras and image storage server. These settings are described in detail in the parallel project Cams-PWA.
Detailed discussion of the application: habr.com/ru/post/654915 and server: habr.com/ru/post/597363.


-
Ensure you're on the
mainbranch and it's up to date:git checkout main git fetch origin git status # Should show "up to date with origin/main" -
Ensure all feature branches are merged:
git log main..fixes --oneline # Should be empty if fixes is merged
-
Update version in
app/build.gradle:- Increment
versionCodeby 6 (e.g., 10101350 → 10101356) - Update
versionName(e.g., '2.4.8' → '2.4.9')
- Increment
-
Update
CHANGELOG.md:- Add new version section at the top with date
- List all changes since last release
-
Commit changes:
git add app/build.gradle CHANGELOG.md
git commit -m "Release vX.Y.Z: Brief description"
- Create and push tag:
git tag -a vX.Y.Z -m "Release vX.Y.Z: Brief description"
git push origin main
git push origin vX.Y.Z
-
Switch to fdroiddata repository:
cd /home/mark/git/fdroiddata -
Ensure branches are up to date:
git checkout master
git fetch upstream
git merge upstream/master --ff-only
git push origin master
-
Update package branch:
git checkout add-onvifcamera-v2
git rebase upstream/master
-
Update
metadata/uk.org.retallack.onvifcamera.yml:- Add four new build entries (one per architecture: armeabi-v7a, arm64-v8a, x86, x86_64)
- Version codes: base-3, base-2, base-1, base (e.g., 10101347, 10101348, 10101349, 10101350)
- Update
CurrentVersionandCurrentVersionCodeat bottom - Builds must be in ascending version code order
-
Commit and push:
git add metadata/uk.org.retallack.onvifcamera.yml git commit -m "Update ONVIF Camera to vX.Y.Z - Brief description" git push origin add-onvifcamera-v2 --force-with-lease -
Monitor CI pipeline at: https://gitlab.com/Retallack/fdroiddata/-/pipelines
Format: XXYYZZZZ where:
XX= Major version (01)YY= Minor version (01)ZZZZ= Patch version + 4 for base (e.g., patch 8 → 0134 + 4 = 0138 → 10101380)
Architecture offsets from base:
- armeabi-v7a: base - 3
- arm64-v8a: base - 2
- x86: base - 1
- x86_64: base (highest)
Example for v2.4.9:
- Base: 10101356 (01 01 0135 + 6 for next patch)
- armeabi-v7a: 10101353
- arm64-v8a: 10101354
- x86: 10101355
- x86_64: 10101356
Copyright (c) 2022-2025 vladpen under MIT license. Use it with absolutely no warranty.