Remote control vehicle project via WIFI, if you decide to carry out this project you will get an entertaining toy prototype that concentrates several technological branches, including electricity, electronics, microcontroller programming, computing, telecommunications and internet services.
This repository includes the source code that will be installed in the microcontroller, in my case I have used the ESP32-CAM microcontroller, however you can use other models (ideally boards compatible with the Arduino IDE) since most of the code is written in leguage C, in case you want to use another board, you should consider the necessary changes in the programming for correct operation.
Click aquí para ver el archivo léame en español
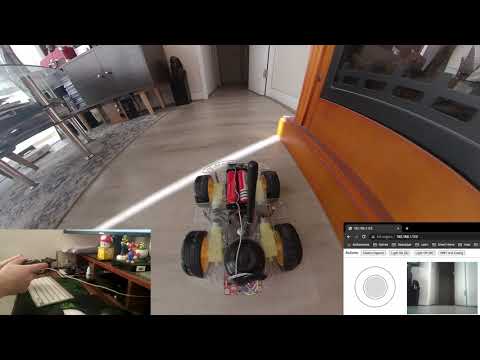
Example of the result you could get:
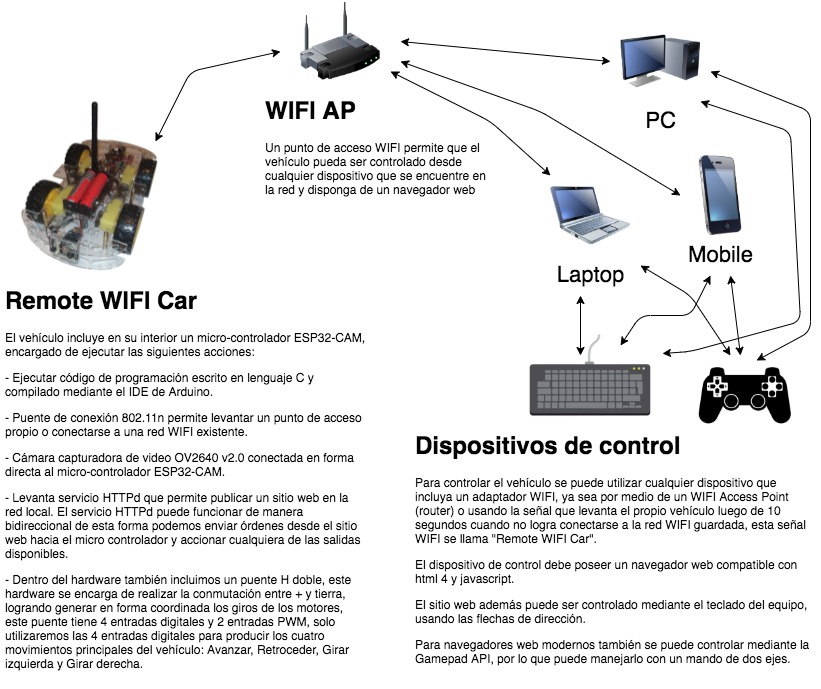
This is an entertaining project to do yourself, with your family or with friends, you will learn a lot about how current technologies work, it is incredible how such a small project has decades of research and technological evolution within it. The diagram below represents everything I say:
Consider having the following tools:
- Soldering iron or soldering iron
- Cutting pliers, stripping cables
- Knife or cutter
- Precision screwdriver (cross)
- Hot or cold silicone gun to stick the plates on the chassis
- Tin
- Insulating tape
- Acrylic glue to glue the wheels (or any glue that is very firm)
Materials:
- Two-motor vehicle kit (or they can be 4), in case you don't have the kit, you can assemble it yourself using 5v DC motors and adding wheels to accommodate you.
- Double H bridge (), if you do not have an H bridge, you can create it yourself using power transistors or relays.
- ESP32-CAM micro controller
- Power switch
- Active Piezo Buzzer, you can use a passive Piezo Buzzer but you should consider changing the GPIO 12 digital output to PWM, or you can also add a pulse generator through a charge and discharge circuit or an LM555 circuit
- Female cables for pin connections (minimum 20 cables)
- 2 Batteries 18650 3.7v over 5000mAh
- 18650 battery holder
- 18650 battery charger
- Minimum 3dbi WIFI antenna (optional) the ESP32-CAM module includes an antenna, it is weak but it can serve in the same way if you do not intend to move away from the vehicle or the WIFI access point, personally I do recommend adding the antenna
Computer
- UART adapter, USB to Serial TTL
- Computer that allows to run Arduino IDE
- Git software
- USB to Serial adapter drivers
- Install esptool.py
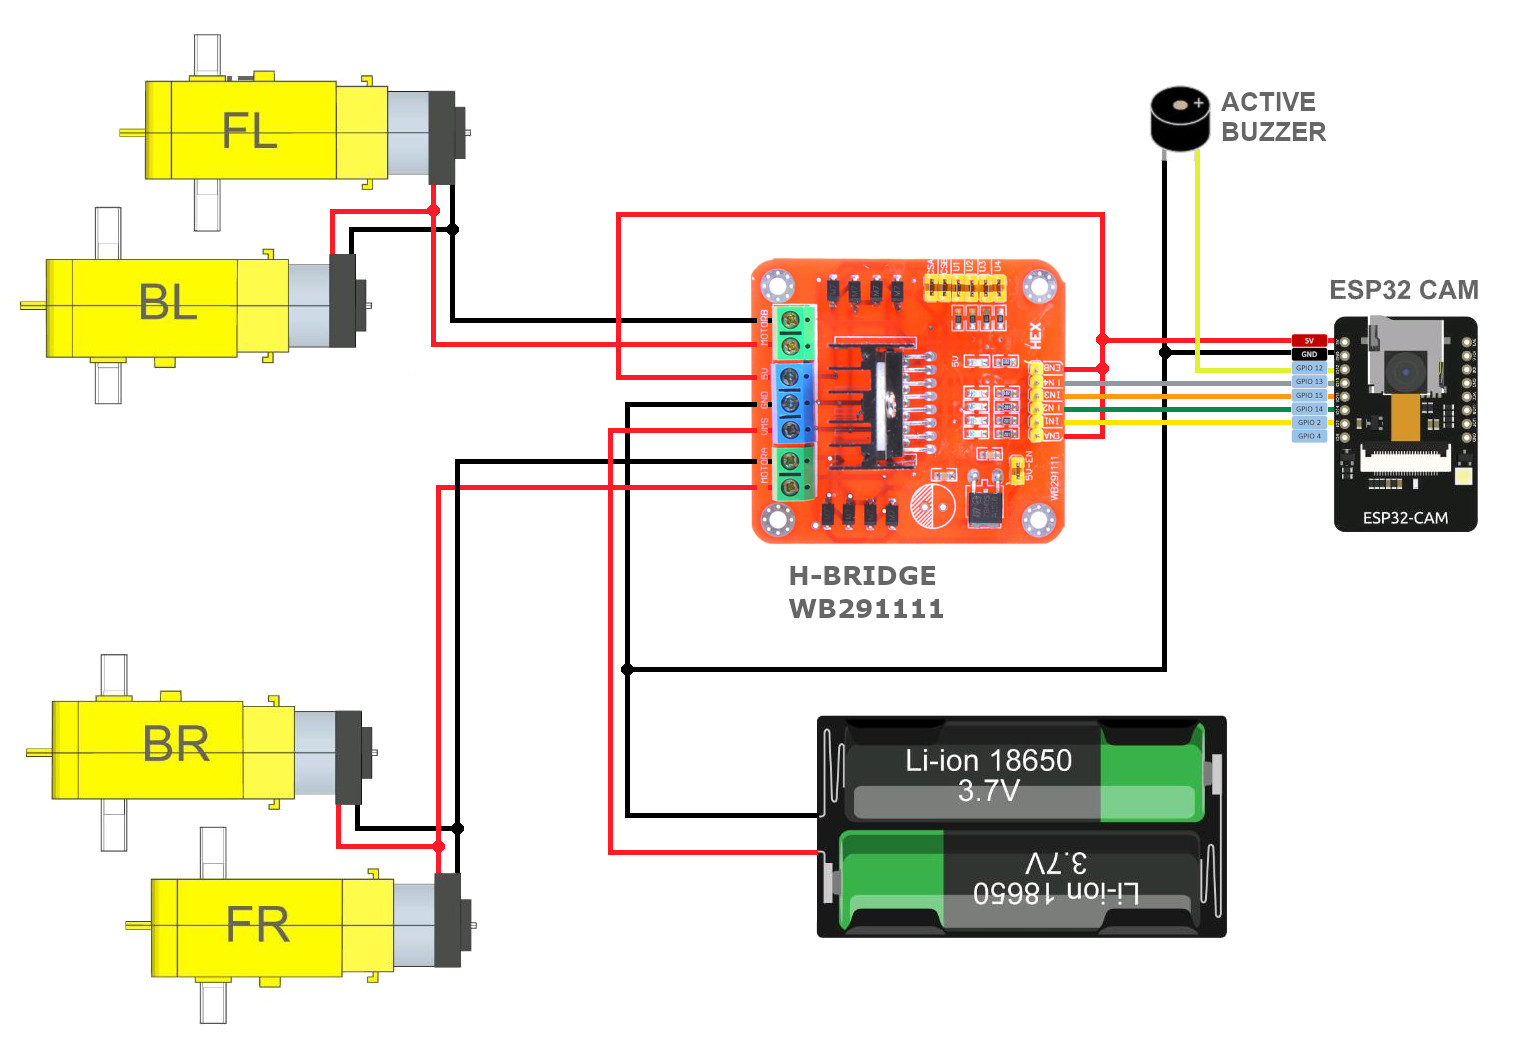
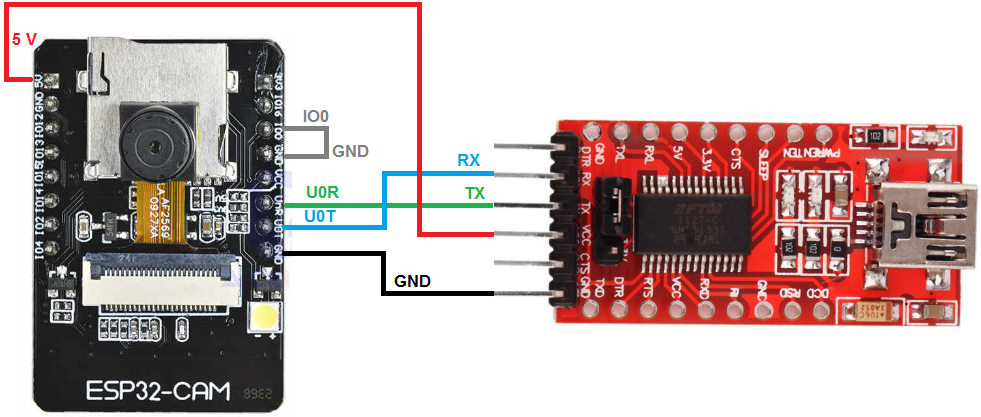
The following electronic diagram shows the connections that you must make between the different components:
Run the following command on your console
git clone https://github.com/pablotoledom/ESP32-CAM-car-server.git- ESP32-CAM-car-server.ino Main project file, includes the methods that initialize the microcontroller and handle the WIFI hardware.
- app_httpd.cpp Web server file, this file is responsible for raising the website, sharing the camera in real time and receiving the http commands to control the movements of the vehicle.
- web_index.h HTML website file, this is a copy of the frontend.html file, only it is compressed by gzip and declared the binary within a header file in hexadecimal.
The Espressif dependency adds ESP32 module compatibility to the Arduino IDE, this software allows the source code written in C language to be compiled correctly for the microcontroller, if you don't install this dependency you won't be able to load the program into the hardware.
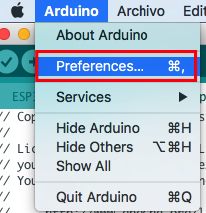
First go to the Arduino IDE configuration and add the following text:
https://dl.espressif.com/dl/package_esp32_index.json: with this address the plate manager will have access to a large set of ESP32 plates and modules from various manufacturers. https://resource.heltec.cn/download/package_heltec_esp32_index.json: with this other, the board manager will have access to the ESP32 development boards marketed by Heltec:

After adding the path, you should now go to the "Boards Manager" and look for the ESP32 dependency:
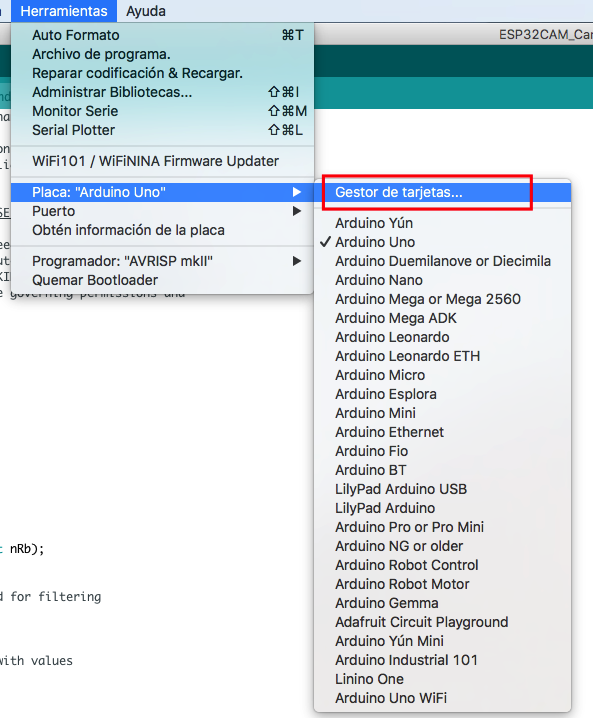
Once found install the dependency:

To deploy the project you must first compile it to verify that it will be installed correctly in the ESP32-CAM microcontroller, for this press the "Verify" button.
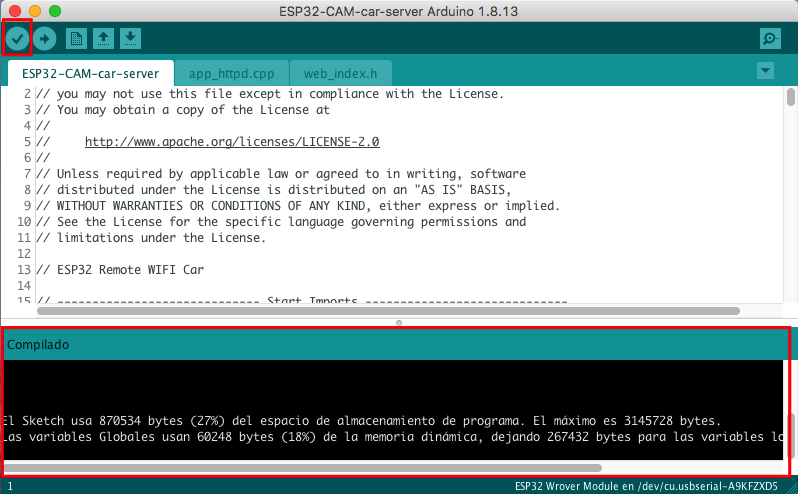
If the console shows clean as in the previous image, you can now load the program in the micro-controller, for this you must connect the ESP32 UART to your computer, remember to add the bridge between IO0 and GND as shown in the following image, the most common way is to use a USB to Serial adapter.
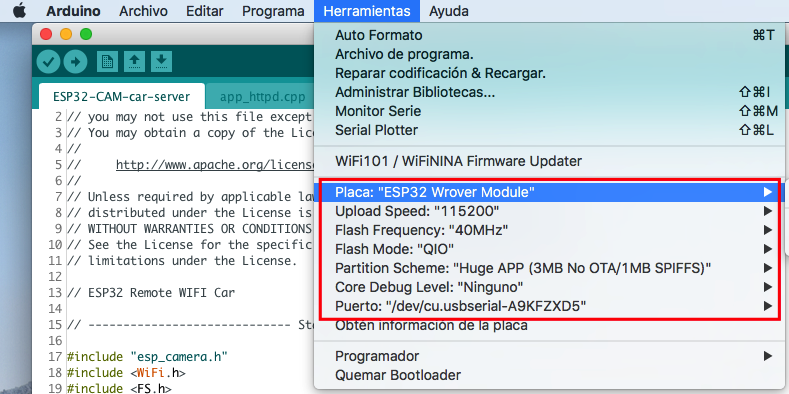
Once connected to the USB to Serial adapter to your computer you must configure the communication parameters in the Arduino IDE:
After you configure the communication between the IDE and the ESP32-CAM UART, you can upload the code to your micro-controller, simply press the "Upload Using Programmer" button and you must also press the only button that the ESP32-CAM board has. , this will enable write mode.
Once the program is loaded, you can remove the bridge between IO0 and GND. And restart the ESP32-CAM.
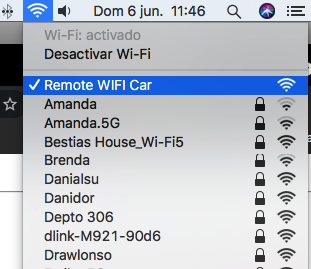
The vehicle will set up an open WIFI network called "Remote WIFI Car"
Once you connect to said network, you must enter the following IP address in your internet browser (either phone, tablet or computer): http://192.168.4.1 and you will see the following Vehicle control and administration website :

Once inside the vehicle's website, you can control it directly from here, or you can also link it to a WIFI network. In case of connecting it to a WIFI network, consider that you will have to manually locate the IP assigned to you (either by entering the router or using network commands) in order to control the vehicle.
The control website includes a WIFI manager where you can see the networks detected by the ESP32-CAM and the respective signal quality, just scan and select your network, add the password if necessary.

You can also change the control buttons, by joystick, try which one suits you best, just remember that you must restart the micro-controller after changing the configuration, either by turning it off or pressing the only button you have.
Pablo Toledo
This project is under the Apache License, Version 2.0 - see the LICENSE file for details.