Convex Panel is a powerful debugging and monitoring suite for Convex applications. It provides a desktop app, mobile app, Raycast extension, and embeddable React components to inspect data, view logs, run functions, and monitor performance in real-time.
macOS (Homebrew)
brew install robertalv/tap/convex-panelmacOS (curl)
curl -fsSL https://raw.githubusercontent.com/robertalv/convex-panel/main/install.sh | bashWindows (PowerShell)
irm https://raw.githubusercontent.com/robertalv/convex-panel/main/install.ps1 | iexManual Download
Download the latest release from GitHub Releases:
- macOS:
.dmg(Apple Silicon & Intel) - Windows:
.msior.exeinstaller - Linux:
.AppImageor.deb
npm install convex-panel
npx convex-panel setup- iOS: Coming soon to the App Store
- Android: Coming soon to the Play Store
Install from the Raycast Store
Browse and manage your Convex database with a powerful data explorer.
- Multiple view modes: table, list, JSON, and raw views
- In-place document editing with full CRUD operations
- Advanced filtering, sorting, and search capabilities
- Bulk operations and document export
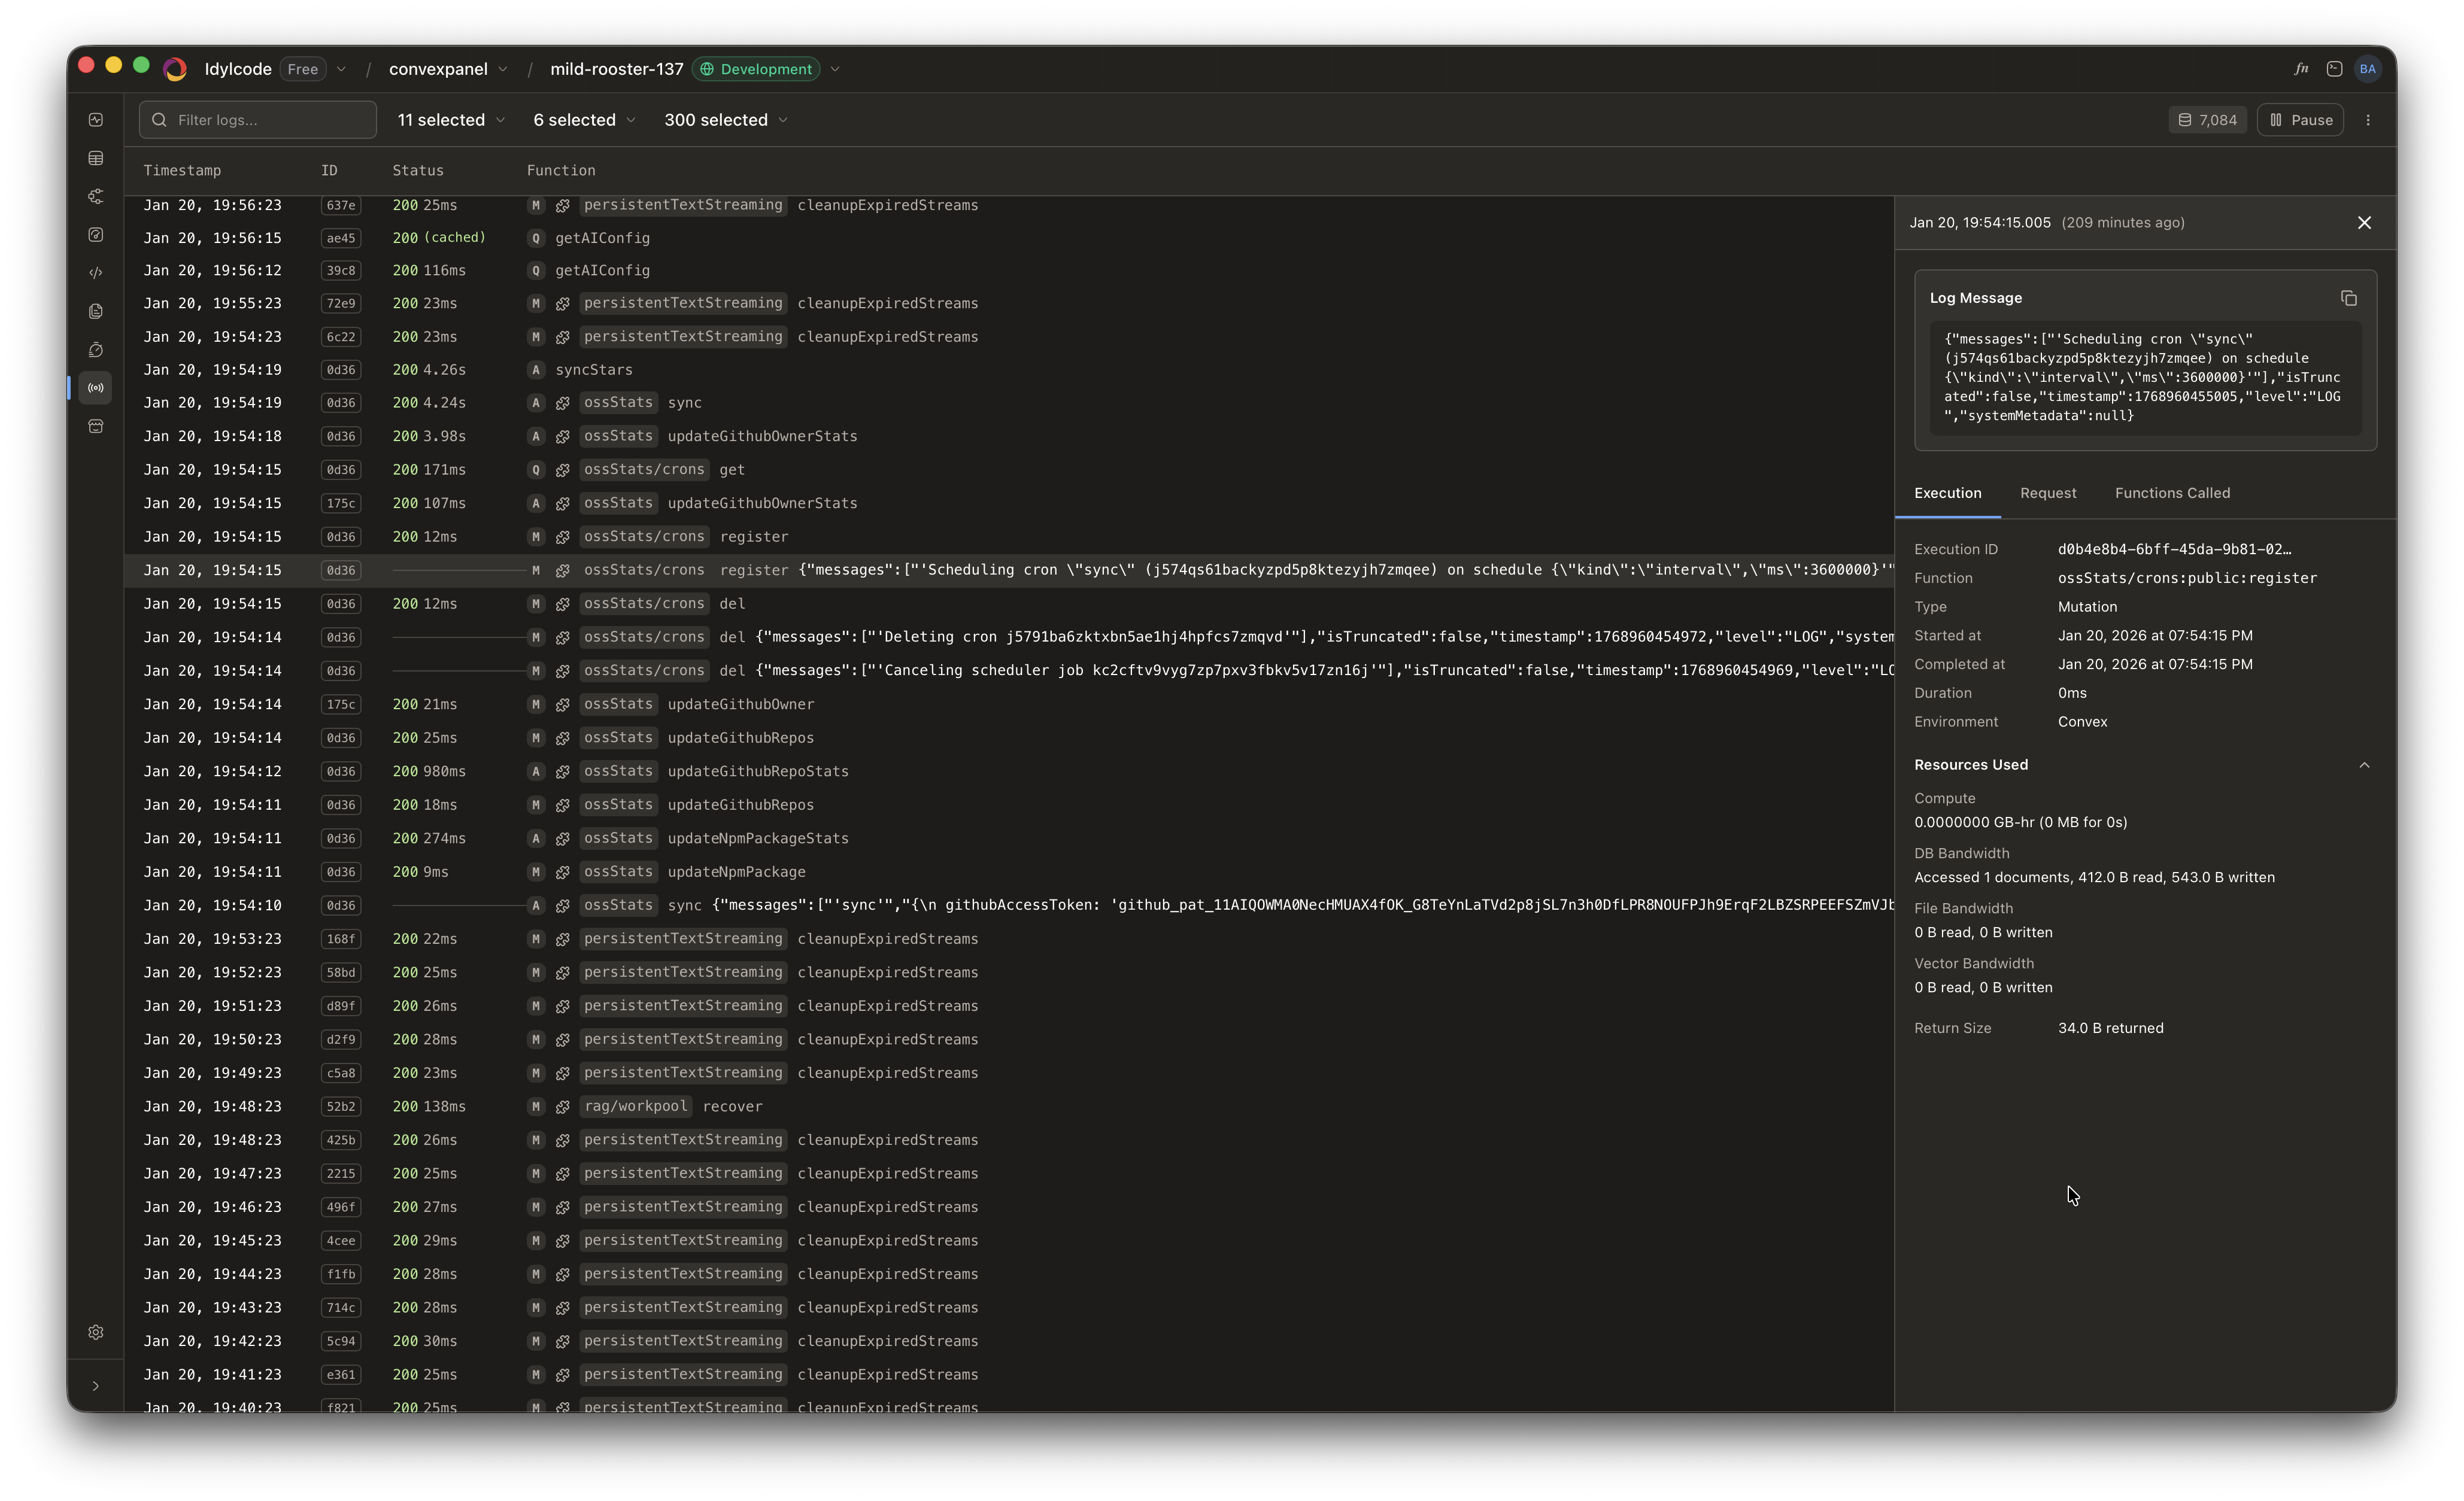
Debug and monitor your Convex functions in real-time.
- Function browser with execution statistics and performance charts
- Source code viewer powered by Monaco Editor
- Live log streaming with automatic updates
- Historical log search with SQLite storage
- Function call trees for tracing execution flow
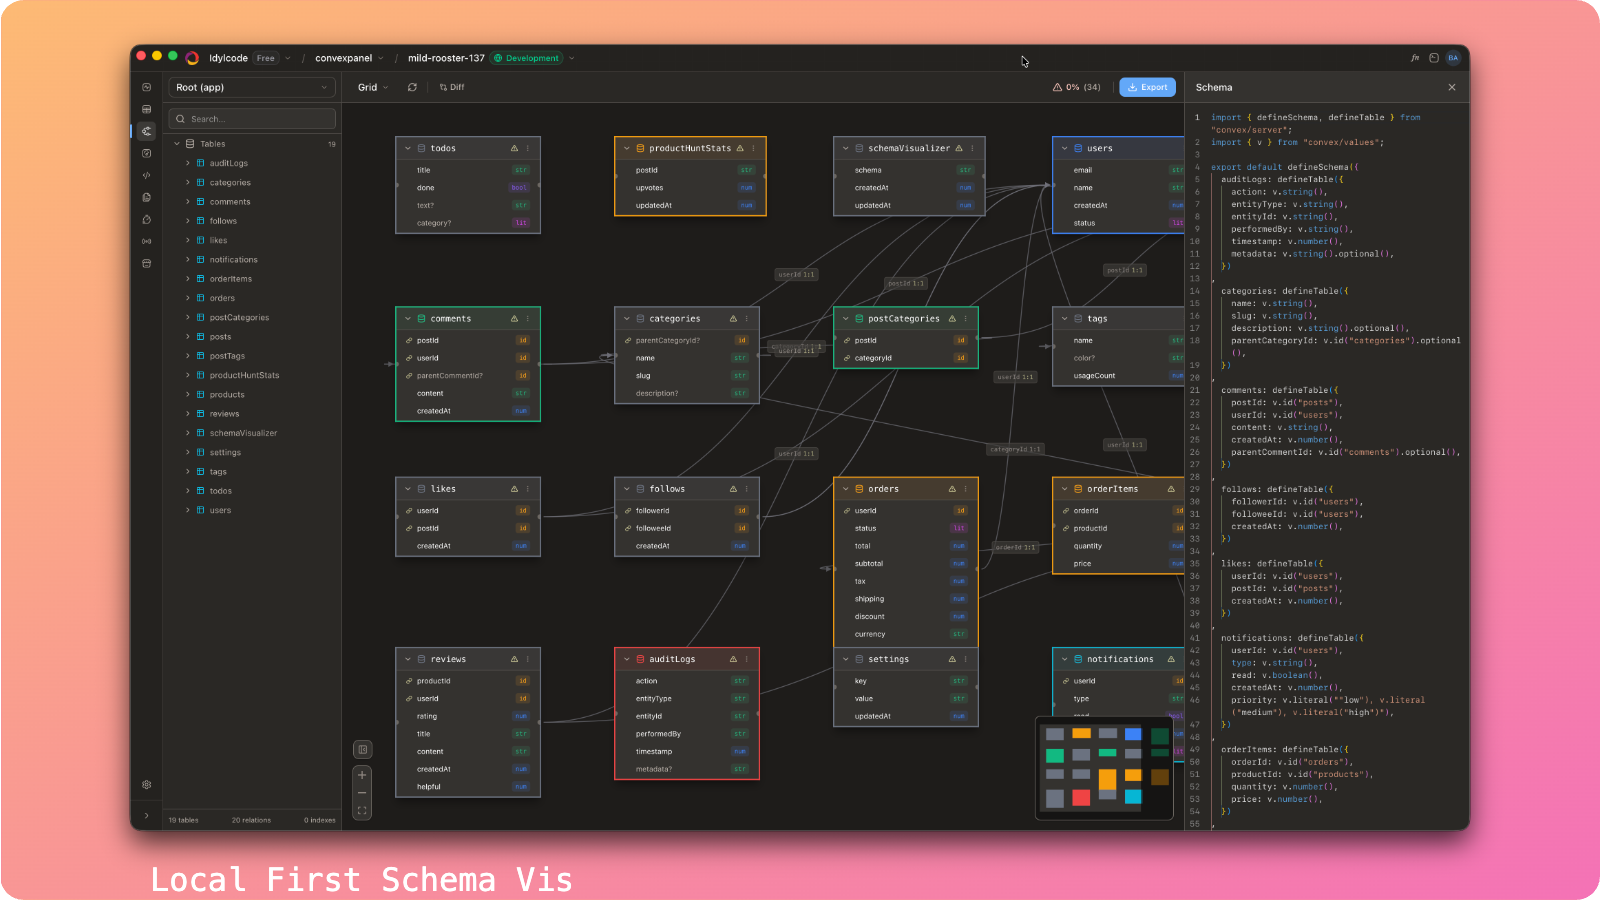
Visualize your database schema with an interactive diagram.
- Interactive ReactFlow-based schema diagram
- Git and GitHub integration with visual diff mode
- Multiple layout algorithms: force-directed, hierarchical, radial
- Export diagrams to PNG or SVG
- Zoom, pan, and filter by table relationships
Get actionable insights to optimize your Convex application.
- Schema health scoring (0-100) with detailed breakdowns
- Actionable recommendations with one-click auto-fix
- Index optimization suggestions
- Query performance analysis
Monitor your application's health at a glance.
- Real-time failure rate and success metrics
- Cache hit rate monitoring
- Latency tracking with percentile breakdowns
- Database usage and storage monitoring
- Team billing overview and rate limits
Manage your Convex file storage with ease.
- Browse, upload, preview, and delete files
- Drag-and-drop upload support
- Image and document previews
- Bulk delete operations
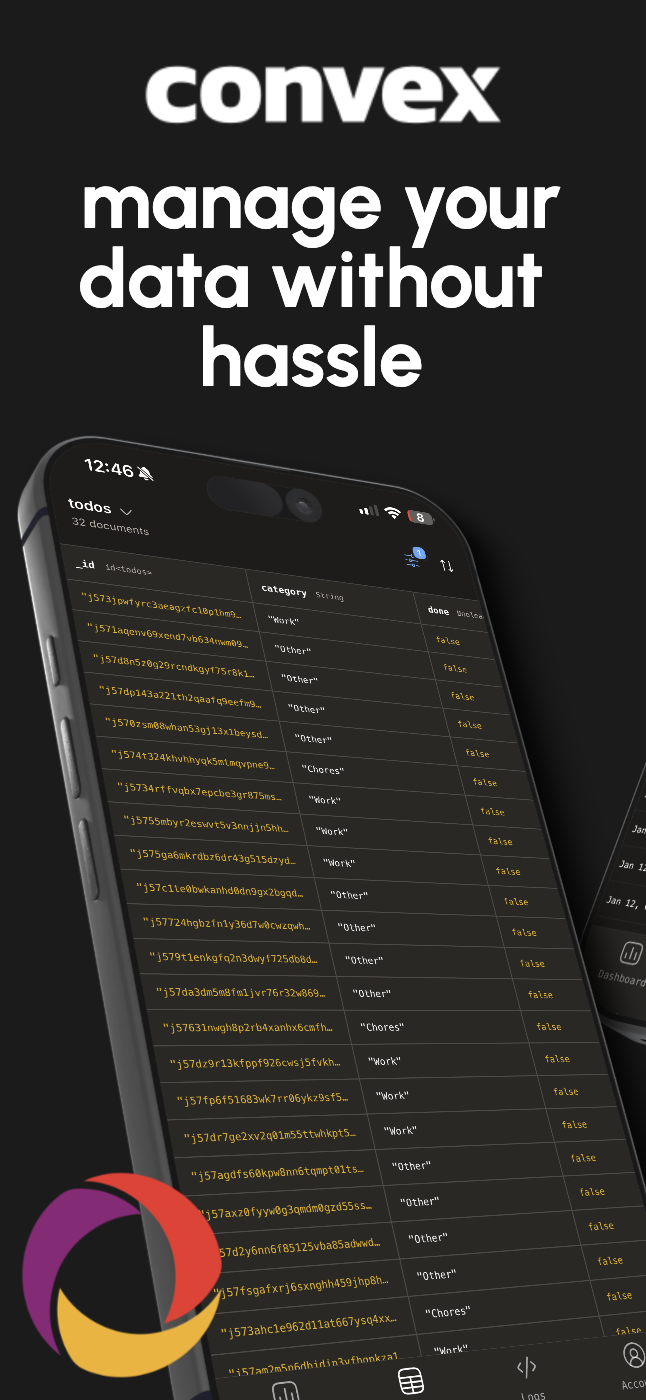
Take Convex monitoring on the go with our mobile app.
- OAuth Device Flow: Secure authentication without typing passwords
- Deployment Switching: Quickly switch between dev, staging, and production
- Data Browser: Browse tables and documents on mobile
- Log Viewer: Monitor logs and errors in real-time
- Push Notifications: Get alerted when errors occur
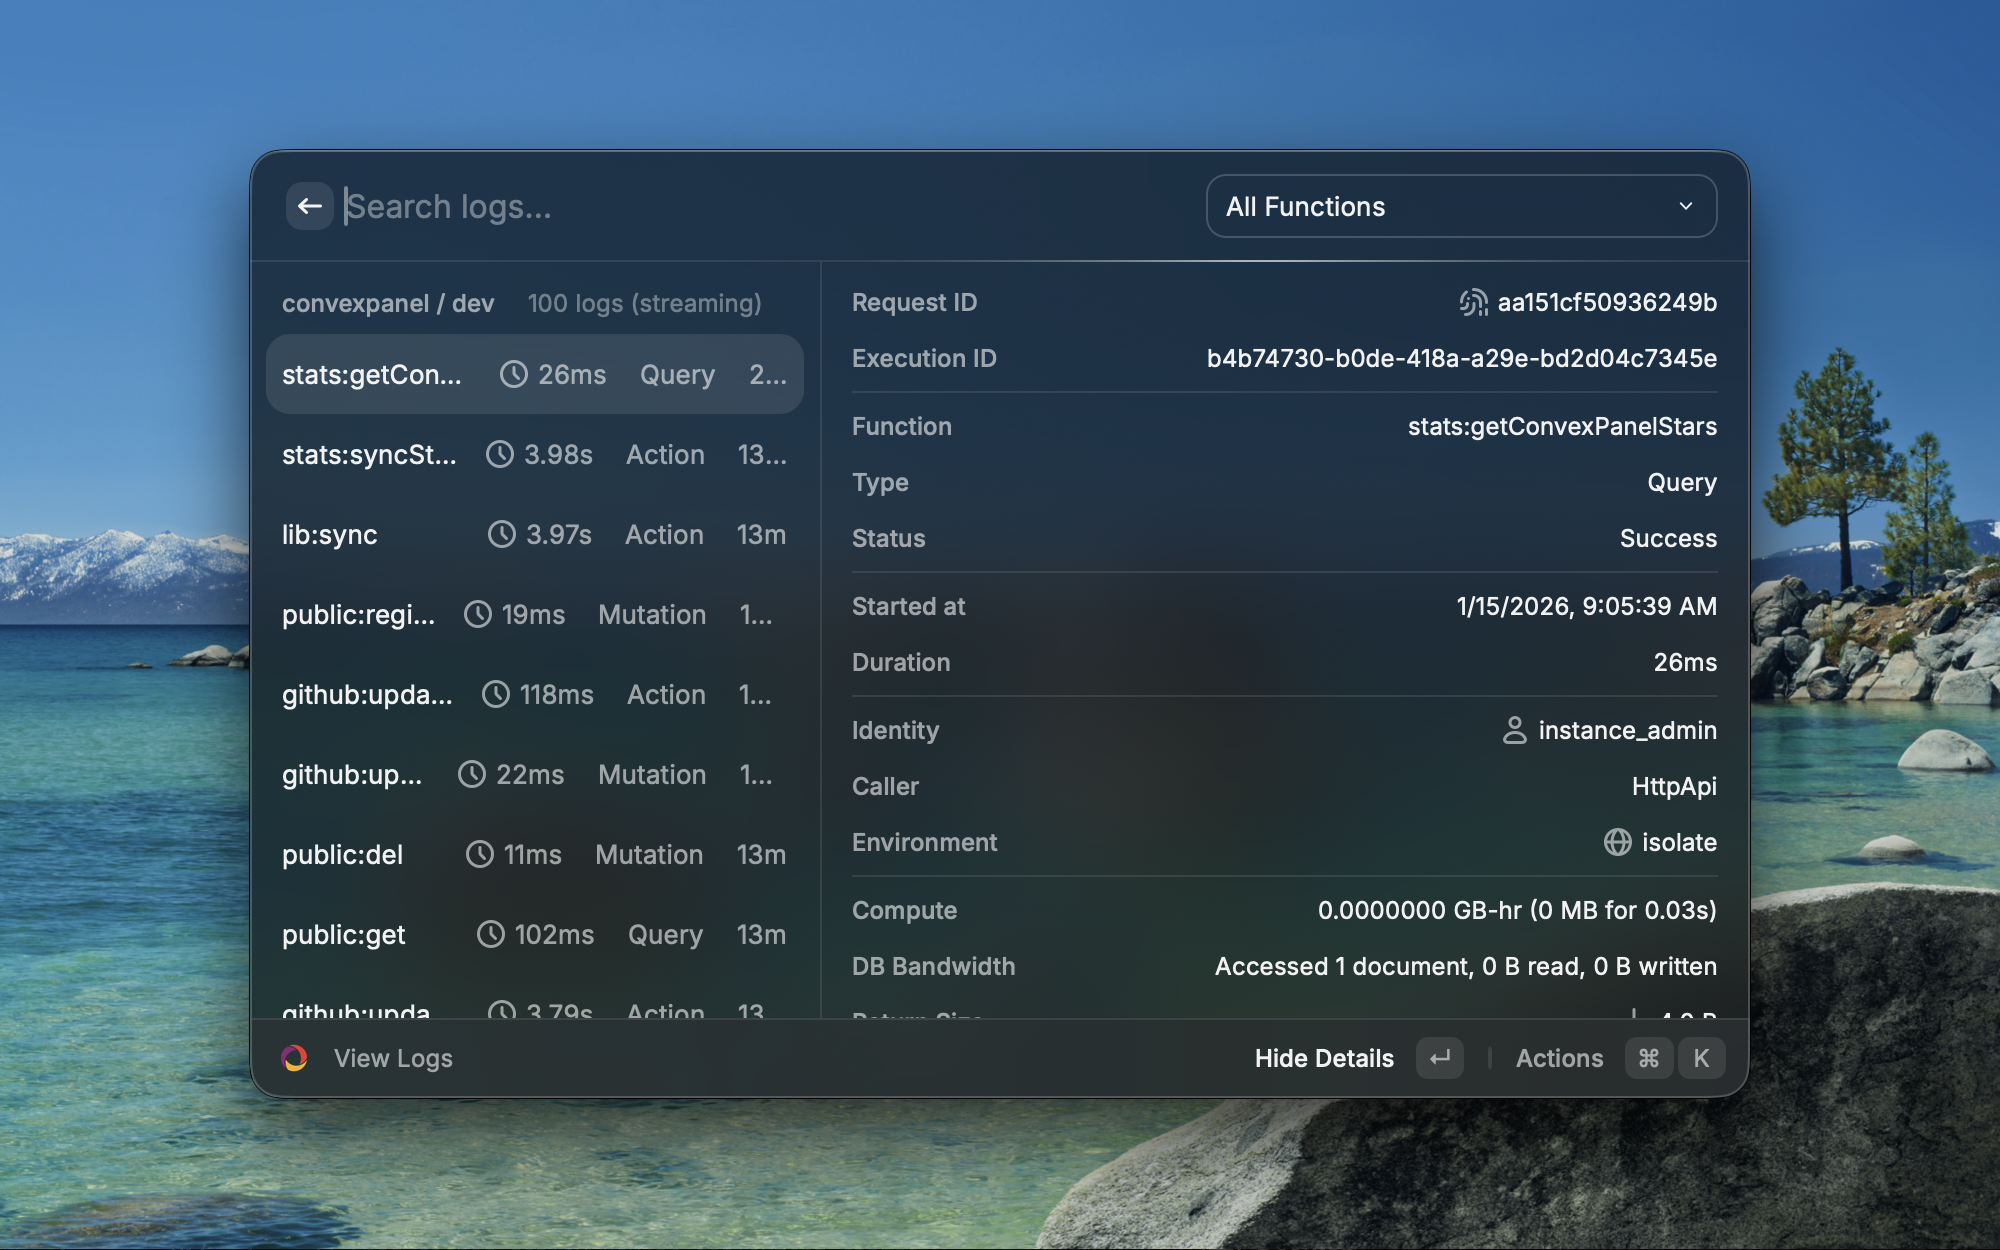
Quick access to Convex from your launcher with 10 powerful commands:
| Command | Description |
|---|---|
| Manage Projects | Switch between Convex projects |
| Switch Deployment | Toggle between dev/staging/prod |
| Run Function | Execute Convex functions directly |
| Data Browser | Quick access to table data |
| View Logs | Stream logs in Raycast |
| Search Docs | Search Convex documentation |
| Browse Components | Explore the component registry |
| Open Dashboard | Jump to Convex dashboard |
| Copy Deployment URL | Copy your deployment URL |
| Configure Deploy Key | Set up deploy key authentication |
Embed Convex debugging tools directly in your application.
npm install convex-panelFeatures:
- Embeddable React components for all major views
- Works with Next.js, Vite, Create React App, and more
- OAuth and deploy key authentication
- Interactive setup wizard with
npx convex-panel setup - Dark mode support
Quick Setup:
- Install the package:
npm install convex-panel- Run the setup wizard:
npx convex-panel setup-
Configure OAuth in your Convex dashboard:
- Create an OAuth application
- Add redirect URIs for your dev and production environments
- Copy the Client ID to your environment variables
-
Import and use the panel:
import { ConvexPanel } from "convex-panel";

function App() {
  return (
    <div>
      <YourApp />
      <ConvexPanel />
    </div>
  );
}| Platform | Requirements |
|---|---|
| Desktop | macOS 10.15+, Windows 10+, or Linux (Ubuntu 20.04+) |
| NPM Package | Node.js 18+, React 18+ |
| Mobile | iOS 15+ or Android 10+ |
| Convex | Active Convex project with API access |
- Node.js 22+
- pnpm 9+ (
npm install -g pnpm) - Rust toolchain (for desktop app development)
git clone https://github.com/robertalv/convex-panel.git
cd convex-panel
pnpm install# Start all apps in development mode
pnpm dev
# Start only the web app
pnpm dev:vite-only
# Start only the Next.js example
pnpm dev:nextjs-only
# Start the desktop app
pnpm dev:desktop# Build all packages and apps
pnpm build
# Lint all packages
pnpm lint
# Run tests
pnpm test
# Clean build artifacts
pnpm clean
# Format code
pnpm formatcd apps/desktop
pnpm tauri buildArtifacts will be in apps/desktop/src-tauri/target/release/bundle/:
- macOS:
macos/*.app,dmg/*.dmg - Windows:
msi/*.msi,nsis/*.exe - Linux:
appimage/*.AppImage,deb/*.deb
convex-panel/
├── apps/
│   ├── desktop/          # Tauri desktop app (macOS/Windows/Linux)
│   ├── mobile/           # React Native + Expo app (iOS/Android)
│   ├── raycast/          # Raycast extension
│   ├── web/              # Marketing website (Vite + React)
│   ├── nextjs-web/       # Next.js example integration
│   └── api/              # API server
├── packages/
│   ├── panel/            # Core React components (npm: convex-panel)
│   ├── shared/           # Shared utilities and API clients
│   ├── backend/          # Convex backend functions
│   └── registry/         # Component registry
├── install.sh            # macOS/Linux install script
├── install.ps1           # Windows install script
└── README.md
For the NPM package, configure these in your .env.local:
VITE_CONVEX_URL=https://your-deployment.convex.cloud
VITE_OAUTH_CLIENT_ID=your-oauth-client-id
VITE_CONVEX_TOKEN_EXCHANGE_URL=https://your-deployment.convex.site/oauth/exchange- Go to your Convex Dashboard
- Navigate to Settings → OAuth
- Create a new OAuth application
- Add redirect URIs:
- Development:
http://localhost:5173 - Production:
https://your-app.com
- Development:
- Copy the Client ID and Client Secret
- Set
VITE_OAUTH_CLIENT_IDin your environment - Set
CONVEX_CLIENT_SECRETin your Convex deployment environment (never expose in frontend)
We welcome contributions! Here's how to get started:
- Fork the repository
- Create a feature branch:
git checkout -b feature/my-feature - Make your changes
- Run tests:
pnpm test - Run linting:
pnpm lint - Commit your changes:
git commit -m "Add my feature" - Push to your fork:
git push origin feature/my-feature - Open a Pull Request
- Use TypeScript for all new code
- Follow the existing code style (Prettier + ESLint)
- Write tests for new features
- Update documentation as needed
This project is licensed under the MIT License - see the LICENSE file for details.
- GitHub Issues - Bug reports and feature requests
- Discussions - Questions and community support